Author

Orlorv Alex

Browsing

Epiphytes are an integral part of a beautifully planted aquarium. Tied to roots or stones, they can be used to realize a wide variety of design ideas. But which aquatic plants are best suited? How are they properly attached? And what is there to consider? In our two-parter, we will tell you some tips for designing dreamlike underwater worlds.

Which epiphytic plants are there for the aquarium?

Epiphytes for the aquarium are aquatic plants that either grow firmly on the substrate over time or can be cultivated there. In nature, plants have optimally adapted to their environmental conditions. In fast-flowing waters, it is necessary for some species to hold on to the bottom with well-adhering roots. These plants are called rheophytes. Only these are “real” epiphytes.

There are basically three types of epiphytic plants:

  1. Plants that naturally gain a foothold on substrates (rheophytes)
    e.g. B. small anubias such as A. nana and A. barteri, Bucephalandra, and many mosses
  2. Plants that can be made to grow on rocks or roots
    e.g. B. Microsorum species, Pogostemon helferi, Cryptocorynae beckettii
  3. Plants that are tied down and otherwise float freely in the water
    e.g. B. Riccia fluitans

Fastening epiphytes: tips and tricks

First of all, you should consider the substrate on which the plant is to be attached or to grow. Decorative objects such as roots or stones are suitable, but you can also green a planted back wall or a Hamburger mat filter with epiphytes.

Epiphytes grow more easily or more quickly on wood or porous rock such as pillow lava than on smooth substrates such as basalt. On soft surfaces such as a filter mat, they can “gain a foothold” in the aquarium particularly well.
It usually takes a few weeks for an epiphyte to grow firmly on the chosen substrate. Until then, you should secure the plant. If you want to tie the plant, a thin nylon or fishing line is suitable in addition to binding wire, but you can also use normal twine.

Fastening options for epiphytes at a glance

  • binding wire
  • underwater glue
  • twine or fishing line

In our experience, the best method for fixing epiphytic plants to roots is always the binding wire. A fishing line or underwater glue is best for attaching aquatic plants to stones. You can find out more about this in the second part of this guide.

Tip: Properly attach mosses in the aquarium

Do you want to tie down mosses, e.g. B. on a stone, it makes sense to use a hairnet. You can get it for a few cents at drugstores. The thin net is ideal for attaching fine-feathered plants to objects almost invisibly until they are firmly established.

The easiest way to attach mosses is underwater glue. For mosses, this quick-acting gel adhesive is available in small, practical tubes.

Be sure to use the most sparingly so that all the fine leaves get enough light. It takes a little patience until the moss has grown and the result looks as desired, but this is the only way for it to develop well.

Tip: plant filter mats with epiphytes

The planting of filter mats, as they are used e.g. B. be used in Hamburg mat filter. All you have to do is cut a few slits in the mat. Now stick the roots of the epiphytes or small tufts of moss into these. It couldn’t be easier! Once the mat is overgrown, it becomes almost invisible in the aquarium.

Is Riccia fluitans suitable as an epiphytic plant in the aquarium?

Especially in the aquascaping scene, Riccia fluitans, also known as floating pond liverwort, have been very popular for years. This aquatic plant can be used to create beautiful underwater landscapes. While it was formerly used floating in the water, Takashi Amano popularized the plant in the tied form. Since then, many aquarists fans have had the desire to create an equally impressive decoration in their home aquarium – and are often bitterly disappointed.

This is simply because Riccia is not an epiphyte per se, it is merely forced to stay underwater by being tied. Artfully shaped with scissors and tweezers, it looks very pretty in the aquascaping show tank. In order to maintain the splendor, however, great effort is required. Many aquarist’s friends do not know that. You will only be able to enjoy him in the long term if you take good care of Riccia and tie it up again every now and then. If you want an easy-care option, then it is better to use mosses.

Mosses – the stars among epiphytes

Mosses have been very popular as aquarium plants for a long time. They grow well on a wide variety of substrates and we can particularly recommend them as epiphytes.

With their finely feathered leaves, mosses offer many aquarium inhabitants excellent hiding places, spawning opportunities, or grazing grounds. For example, they are now indispensable in shrimp tanks. Due to their large surface, they also offer the desired bacteria a large colonization area and thus also contribute to an improvement in water quality.

The Christmas moss, whose dense, branched shoots are reminiscent of fir branches, is one of the particularly recommended species. With it z. B. planted the back wall of the aquarium excellently. You should prune the moss every now and then and thin it out if it grows too dense. Otherwise, it does not require any special care.

Our TOP 3 of the best epiphytes for the aquarium

  1. Mosses (e.g. Christmas moss)
  2. Anubias Nana – Zwergspeerblatt
  3. Microsorum species

We can particularly recommend these aquarium plants because they are easy to cultivate, grow well on the substrate and root themselves on the substrate after a while.

Anubias, the spear leaf, looks particularly natural in combination with roots and mosses. They are robust and undemanding in terms of nutrients and light – making them an ideal plant for the beginner’s aquarium. Thanks to countless subspecies, sufficient variety is guaranteed in the aquarium.

Microsorum, the java fern, has also proven itself in the aquarium. Just as robust and diverse, there are different subspecies of the Java fern, which differ in size and leaf shape and thus ensure a sufficient selection.

Anyone looking for an epiphyte with bud sites should check out Bucephalandra.

What are your personal TOP favorites for epiphytes? We welcome comments!

What is the best method to fix epiphytes in the aquarium on the chosen substrate? It doesn’t matter whether you want to attach aquatic plants to roots, stones, or other surfaces – it is important to give the plant a reliable hold without damaging it. In our last post, we showed you which varieties are well suited as epiphytes. Today we will present the mounting options in more detail and explain what you should consider.

Stick on with underwater glue

It couldn’t be simpler: gluing on plant rhizomes has become possible in recent years with the introduction of non-toxic silicone glue that sets underwater. This method is used for the production of larger quantities of epiphytes on root wood, especially in nurseries, and has proven itself very well.

Modern underwater adhesives retain their adhesion even on wet surfaces. This offers us the opportunity to glue the thick rhizome roots of Anubien but also, for example, Cryptocoryne beckettii directly onto a lava rock or an aquarium root.

  1. To do this, take a large bowl about 3 cm filled with water and place the damp object on which the plants are to be glued in the middle. A spray bottle with fresh water should also be available.
  2. After the plants have been freed from the pots of any stone wool that may still be sticking under running water, place the sections to be glued on in the bowl ready to hand.
  3. If several aquarium plants are to be glued to one root, then start with the lower plants and slowly work your way up. For this purpose, an approx. 1-2 cm long strand of glue from the tube is applied to the root at a suitable point.
  4. The plant root is now pressed into the underwater glue in such a way that at least half of the rhizome is stuck in the glue strand.
  5. In the case of heavy plant parts, it may be necessary to fix them with a rubber band, for example. Small sections of Anubias barteri nana usually do without fixage.
  6. When working, you should occasionally moisten the leaves with the spray bottle so that they do not dry out.
  7. When all the pieces of the epiphyte are glued on, carefully place the whole thing in a large container of water. The underwater glue binds within 24 hours so that the root can go back into the aquarium. Full strength is achieved after three days.

Already knew?

Underwater glue is also ideal for fixing moss. It is best to use the practical gel moss glue in a small tube.

Tie up with binding wire

In addition to fishing lines and twine, the binding wire has proven particularly effective for tying up aquatic plants. The suitable wire is available in the craft departments of all hardware stores for little money. When buying, make sure that the binding wire is covered with plastic and is easy to bend with your fingers. We use OBI’s 2.95 wire as shown in the photo. Depending on the size of the plant, tweezers can also be helpful when fixing.

To prepare, proceed with gluing. So prepare a bowl with water and a sprayer and free the plant roots from the rock wool. You will also need pointed pliers and small side cutters.
When tying the epiphytes, push the binding wire through the root system so that the thick rhizome is in a wire loop. Then they estimate the length of the two protruding wire ends, which is necessary to twist the wire on the opposite side of the root.

Cut the wire accordingly and twist both ends behind the piece of root first with your fingers, then with the tip of the pliers. But beware! The rhizome must not be punctured by the wire or crushed too much. Therefore, the thinnest possible, slightly flexible binding wire is better than the thicker version. In between sprays, the plant leaves several times with water.
The advantage of the wire method is, of course, that the planted roots can be put straight back into the aquarium. However, this method requires a lot of finesse to avoid damaging the roots

Untie with twine or fishing line

Tying up with twine is the most common method for tying up aquarium plants – there is a piece of twine in every household that can be used to fasten the plants. The procedure is similar to tying up the plants with binding wire.

However, when using twine or similar, it is more difficult to fix the plants in the right position. Another disadvantage: Many cotton threads stretch underwater over time and the connection loosens as a result. Some even dissolve completely. If the plant has not yet established itself by then, this can be a problem. With aquarium plants that quickly find a foothold on the substrate, it can even be desirable for the threads to disappear by themselves after one.

If you want to avoid unraveling the line, choose thin nylon or a fishing line. It is barely visible and durable. However, when tying it up, be particularly careful not to constrict or damage the aquatic plants too tightly.

The best attachment method for epiphytes – our tip:

When asked about the best method of fixing epiphytic plants to the roots, we clearly tend towards the binding wire. We recommend fishing lines or glue for attaching aquatic plants to stones.

What do you think is the best method of attaching epiphytes to the aquarium? Testimonials are welcome!

Turtles either sleep underwater, in their shells on land, or hidden in burrows. But you can’t really get that from sleep. Turtles rest rather than sleep.

How long can a turtle stay underwater?

The palm-sized animal can move in cold water of ten degrees for up to 100 days without coming to the surface. At a water temperature of three degrees, even dives of 150 days are possible.

How do water turtles sleep?

Turtles can stay in the water for a long time without having to breathe. They also like to sleep on the pool floor, on the sun island or “float” in the water, sometimes using one leg to hold on.

Why can’t you touch turtles?

This can mean enormous stress for the animal. They can sense your touch and don’t like being fondled. Turtles are reptiles, so they sometimes need to go to the surface to breathe.

Can turtles live in water?

They can live on land, in water, or in both environments. A green turtle (Chelonia mydas) swims over a reef in the southern Caribbean. The species is considered critically endangered. An easy way to tell tortoises and sea turtles apart is to look at their feet.

Do aquatic turtles sleep underwater?

A roosting or resting place can be created for a turtle by placing a shallow water area in the tank. This area of shallow water should be such that the turtle is completely submerged but can easily lift its head out of the water to breathe.

Aquatic turtles are able to sleep underwater wherever they see fit. It is important to note the difference between aquatic turtles and tortoises. Tortoises, of course, cannot sleep under water!

Do slider turtles sleep underwater?

Do red eared sliders sleep underwater? Yes, they do. While sleeping they either float on the surface or sink at the bottom of the tank. The turtle inflates its throat in order to help him float!

How long can slider turtles stay underwater?

If the turtle is motionless, it can stay 40 to 45 minutes underwater sleeping. At most, red eared sliders can spend an hour underwater before coming up for air. This information is all based on the average adult red eared slider. Baby turtles cannot spend this much time underwater.

Do sliders sleep underwater?

Red-eared sliders are excellent swimmers. At night they sleep underwater, usually resting on the bottom or floating on the surface, using their inflated throat as a flotation aid.

Why does my red-eared slider sleep in the water?

Sleeping in the water ensures that red-eared sliders are safe from surface predators and remain hydrated. They still need to breathe air, so they often use their throats as floatation devices, keeping them at the water’s surface to breathe through the night.

Do red-eared turtles sleep underwater?

Red-eared sliders are excellent swimmers. At night they sleep underwater, usually resting on the bottom or floating on the surface, using their inflated throat as a flotation aid.

Do baby turtles sleep underwater?

You don’t have to worry about your turtle drowning while sleeping underwater. For them, it is a completely normal process. When the turtle needs air, it will automatically resurface.

Baby turtles are known to sleep in a similar way as adults; however, they sleep longer. Aquatic turtles can stay submerged for four to seven hours and bob their head out of the water to get some air. Land turtles are asleep longer than they are awake, like the Galapagos turtle that sleeps for about 16-18 hours a day.

Do snapping turtles sleep underwater?

Although map turtles can sleep on land, as well as, underwater, snapping turtles are known to either submerge themselves in the water or logs near the accumulated waste near marshy areas. Terrapins such as the red-eared slider can sleep underwater. Even pet turtles can also be seen sleeping at the bottom of the tank.

Do African sideneck turtles sleep underwater?

The first thing you’ll need to add to your aquarium is NOT optional: because African sideneck turtles are only semi-aquatic rather than fully-aquatic, you need to provide some “land” for the turtle to bask on. Ideally, this should be enough space for the turtle to bask, walk around a bit, and burrow.

Do map turtles sleep underwater?

As you may already know, some turtles such as the red-eared slider and the painted turtle can go several hours (about 5 hours) without breathing. So yes, turtles do sleep underwater. Species such as painted turtles, map turtles, sliders, mud turtles, musk turtles all sleep underwater.

Do red slider turtles sleep underwater?

These so-called papillae function in a similar way to gills in fish. A perfect piece of diving equipment that the musk turtles have in their mouths. They only come ashore to sunbathe a bit. The Musk Turtle – can breathe underwater and get pretty stinky.

Red-eared sliders are excellent swimmers. At night they sleep underwater, usually resting on the bottom or floating on the surface, using their inflated throat as a flotation aid.

With just a few tricks, you can make your aquarium look bigger and create an interesting look: The placement and selection of substrate, decorative objects, and aquarium plants make a decisive contribution to the depth effect of the facility. We will show you here what you should pay attention to when laying out a tank so that even small aquariums can make it big and become a fascinating eye-catcher.

A larger-looking aquarium: depth effect due to the sloping substrate

The most well-known method of making the aquarium appear larger is to let the substrate of the substrate continue to rise towards the back. The aquarium gravel or sand is introduced when the tank is set up in such a way that there is a slope towards the front.

Increasing substrate not only has visual advantages but also benefits the plants in the aquarium: Since larger aquatic plants usually grow in the background, they have enough space for root development. The thinner layer in the foreground ensures that the plants don’t spread too much here and possibly restrict the view.

However, there is one problem with this method: the gravel or sand will slide forward again over time. The substrate is moved and permanently leveled by work in the aquarium or by residents such as burrowing fish or shrimp. This difficulty arises above all in freshly set up tanks in which the roots of the aquarium plants have not yet established sufficient stability in the substrate.

The only short-term solution is to occasionally move part of the substrate from the front to the back when maintaining the aquarium. An aquascaping tool such as a substrate smoother or a hose that sucks up part of the substrate and distributes it further back can be used for this.

Some aquarists try to help themselves with styrofoam plates or stones that you put under the substrate. However, these do not offer the plants any space for root development and are therefore suboptimal.

A dense carpet of ground-covering aquarium plants, on the other hand, is the best way to keep the substrate in shape. Hilly landscapes can also be realized and permanently fixed in this way.

Strips of plastic foil are a popular trick to preserve the substrate while the plants are still developing roots. The strips can either be removed after a period of time when the roots of the aquatic plants give the soil enough support, or they can remain in the aquarium.

We can particularly recommend these plants as ground cover:

  • Glossostigma elatinoides – Australian tongue leaf
  • Marsilea crenata – dwarf clover fern
  • Eleocharis spec. ‘mini’ – dwarf needle rushes
  • Cryptocoryne Parva – Small water cup
  • Sigittaria subulata – Little Arrowhead
  • Helanthium tenellum – Delicate swamp flower
  • Hemianthis callitrichoides – Dwarf Pearlwort

Depth effect in the aquarium through optical illusions

It couldn’t be simpler: If you follow the following rule, you create the impression of depth in the tank and ensure that the aquarium looks larger and more interesting.

Take advantage of the laws of optics and create an illusion in your aquarium. Anything further ahead appears larger. Arranging your aquarium so that ornaments and plants are larger in the foreground and smaller towards the back will create the impression of depth. Because the substrate rises towards the back, the smaller decorative objects remain clearly visible and are not covered by the ones in front.

Almost every aquarist thinks of the categories “foreground, middle ground, and background” when setting up the aquarium and when selecting plants. However, a lavishly furnished and planted pool consists of additional layers – the more “multi-layered” you plant your pool, the greater the depth effect you create. Make sure the layers overlap, so the front layer doesn’t completely cover the back ones. This creates an interesting and varied pool layout.

Decoration of the back wall

The selection of the back wall or background foil should also be carefully considered. Photo-printed transparencies, which are commonly used, are not necessarily ideal for creating visual depth. The reason: the printed plants are easy to see, so there is no illusion that the background is far away.

Slightly transparent, milky-white foils are often used in the aquascaping scene, often with additional lighting. The background appears so diffuse and optically moves further back – because what lies further back we see blurred. In the home aquarium, you don’t necessarily have this possibility of optical illusion. However, foils in dark blue or black offer a good alternative.

A three-dimensional background is another way to visually add depth to the aquarium. So-called 3D backgrounds have a deep structure that can be used to create great effects. It is particularly appealing if you also green the back wall with moss or epiphytes.

When setting up the aquarium, you should think about how you want to design the tank and what elements you want to use to create depth and a varied look. But you can also use these tricks afterward to create visual depth in your aquarium and make it even more exciting.

How are your experiences? We welcome any comments on the topic.

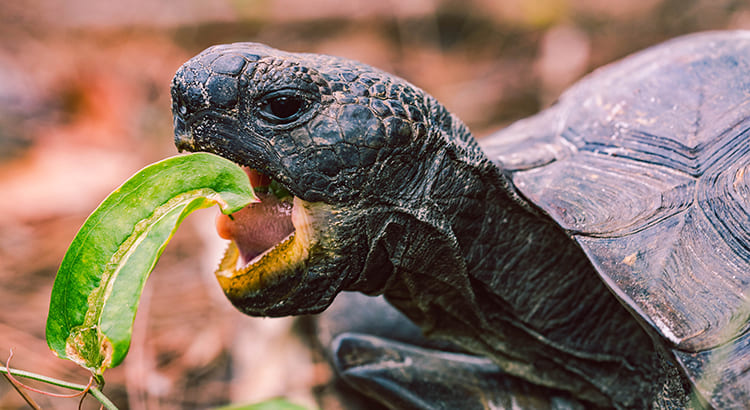
The turtle opened its beak.

The turtle moved to the side of the road.

The turtles’ toenails slipped in the dust.

The turtle kept on moving forward.

How Turtles Get Their Shells

A Japanese research team is able to explain for the first time how the bony shield on the reptile’s back is formed. Contrary to what was previously assumed, it does not form from bones that lie within the skin. Rather, the decisive impulse comes from the ribs.
The turtle’s body plan is mysterious and very different from that of other vertebrates. For a long time, scientists assumed that the shell of the animals is formed in a similar way to that of crocodiles. A mistake, as it turned out: the rib bones already emit chemical substances during development in the egg, which cause the surrounding structures to ossify and form an armor. Since the ribs are thus enclosed in the carapace, they grow on the animal’s back and do not migrate under the shoulder blades as in all other vertebrates. The Japanese researchers led by Hiroshi Nagashima from the Center for Developmental Biology in Kobe report on their work in the journal “Science”.

In order to understand the evolution of the turtle shell, the scientists compared embryos of the Chinese softshell turtle Pelodiscus sinensis with those of chickens and mice. In turtles as well as in other animals, the embryonic development shows a kind of fast-forward evolution and provides information about the individual stages.

Initially, the development of all three animals was similar, the scientists explain. However, when the ribs overlap the shoulder blades, a fold forms along the torso in turtles. This fold is a barrier that keeps the ribs from growing around the trunk to form a rib cage. The rib bones remain limited to the animals’ backs and ensure that the armor develops. As a result of these processes, the tortoise’s shoulder blades remain under and are covered by the ribs. The fold that formed at the beginning of this development later also separates the legs from the carapace in the fully developed animals.

Ribs as signal transmitters

In fact, it seems to be the ribs themselves that give the signal for the formation of the carapace. They grow into the region where the carapace will later form, and there they give signals for the ossification of existing structures, the scientists write.

Until now, researchers have assumed that turtle shells develop in a similar way to crocodiles, for example. In these, bones that lie within the skin form the armor. In the ancestors of the tortoises, the bony shells, so-called osteoderms, enlarged and finally united to form large plates, was the previous assumption.

How did the turtle defend itself against the red ant?

It crushed the ant between its body and legs.

What are the problems that affect the survival of turtles?

These threats include coastal development, pollution, direct harvest, invasive species and vessel strikes. With the encroachment of hotels, parking lots and housing along nesting beaches, female turtles are forced to use suboptimal nesting habitats.

How do turtles protect themselves from their enemies?

A primary defensive tactic for many turtles is to simply withdraw into their shell. Some species, like box turtles (Terrapene carolina) have evolved hinges that allow the shell to close completely, encapsulating the reptile safely inside.

What do you think is the biggest danger facing sea turtles?

Incidental capture by fishing gear is the greatest threat to most sea turtles, especially endangered loggerheads, greens, and leatherbacks. This threat is increasing as fishing activity expands.

Why can’t you touch turtles?

This can mean enormous stress for the animal. They can sense your touch and don’t like being fondled. Turtles are reptiles, so they sometimes need to go to the surface to breathe.

What are the peculiarities of the turtle?

Like all reptiles, they have four different color receptors and can therefore also perceive infrared and ultraviolet radiation. Turtles are also very good at smelling. Aquatic turtles perceive scents through chewing-pumping movements of the lower jaw and throat.

What sounds do turtles make?

The noise sounds like the croaking of a small frog or like a crunch/scratch.

How can you describe a turtle?

Name: turtle
Latin name: Testudinata
Class: reptiles
Size: 15 – 250cm
Weight: 100g – 800kg
Age: up to 200 years
Appearance: dark green, brown, black
Sexual Dimorphism: Yes
Diet Type: Omnivore
Diet: Vegetable and carnal foods
Distribution: worldwide
original provenance: unknown
Sleep-wake cycle: diurnal
Habitat: river, sea, ocean
natural enemies: alligators, sharks, crocodiles
Sexual maturity: between 5 – 20 years
Mating season: species specific
Incubation period: 60 – 120 days
Clutch size: up to 200 eggs (depending on species)
Social behavior: partly group-forming
Critically Endangered: No

How do the turtles live?

She has to go into hibernation in autumn in good time. There are about 356 species of turtles on earth today. Most of them live in fresh water—that is, in lakes, ponds, streams, and rivers (or in zoo enclosures, like these red-eared sliders). Seven species live in the sea, around 50 species only on land.

Who eats turtle

Enemies: Despite their shell, turtles have some enemies. In the warm, tropical areas these are alligators, sharks or crocodiles. Crabs and seabirds also target the newly hatched juveniles. Because the armor of the little ones is not that hard.

What don’t turtles like?

Turtles either sleep underwater, in their shells on land, or hidden in burrows. But you can’t really get that from sleep. Turtles rest rather than sleep.

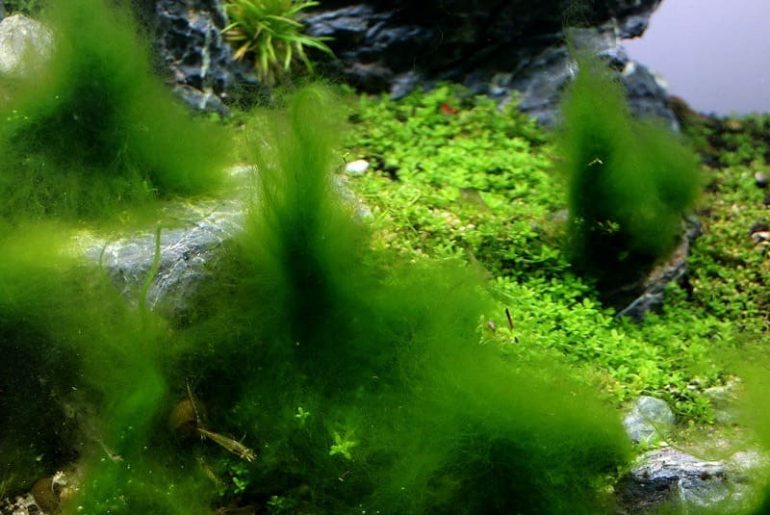
The thread algae are one of the types of algae that are very widespread in our aquariums. It belongs to the family of green algae (Chlorophyta), which also includes hair algae, floating algae, and spot algae. Every aquarist has probably already housed one or the other form of green algae in their tank. Here we explain which factors cause the growth of filamentous algae, and how you can combat algae in the aquarium and prevent them from forming again.

Filamentous algae despite good water values

Green algae, including filamentous algae, use and need the same nutrients and trace elements in the aquarium as the aquarium plants that are deliberately introduced and cared for – from the aquarium owner’s point of view, this is unloved competition.

Filamentous algae only thrive poorly or not at all in tanks with nitrate values ​​of 40 mg/liter or more. So their occurrence in the aquarium initially seems to speak for the quality of the water values. In fact, thread algae are often found in pools that have good water quality. However, algae are generally a sign of a disturbed balance in the aquarium.

That is why the apparent contradiction at first glance may surprise some people. However, the connection is as follows: the formation of thread algae is caused, among other things, by an oversupply of nutrients. As the algae grow, they use up these substances, so that when the aquarium owner discovers filamentous algae and tests the water parameters, they will find that they are “in the green”. It becomes clear: the problem is not the thread algae, but the factors that contribute to their well-being. Research into the cause is appropriate.

Conversely, this also means that combating filamentous algae is basically simple: if aquatic plants are encouraged to grow vigorously, the larger they grow, they use more and more of the previously excess nutrients – ergo there is less food for filamentous algae.

The best method if you want to permanently eliminate thread algae is to ensure good growth of the aquarium plants.

Reasons for the appearance of thread algae

Another possible reason for the appearance of thread algae can be the lighting. If it is too bright in the tank, if the lighting is too long or too long and too intense, or if the wrong light source is chosen, this can promote the growth of thread algae and other types of algae.

Water care also plays an important role: leftover food or dead plant parts that collect in the tank can degrade the water quality and promote the growth of thread algae.

This is how the growth of thread algae is promoted:

Inappropriate lighting

  • too much light in the tank (too intense or long lighting, direct sunlight)
  • unsuitable technology (HQI spotlights or outdated neon tubes)

Elevated nitrate or phosphate levels, caused by

  • generous feeding
  • dead plant debris
  • too high stocking density
  • fish droppings in the water

Combat thread algae and prevent their formation

The first step in combating thread algae is simple: you must first eliminate it manually, i.e. remove it by hand. Thread algae grow as a single thread on the edges of the leaves and can reach a length of more than 30 centimeters. They are relatively easy to remove by wrapping them around your finger or aquarium tweezers like a thread. It must then be ensured that they do not form again.

If you want to permanently get rid of the unloved subtenant thread algae, the parameters described above, such as water values ​​and lighting, should first be examined. You can also find more tips in our article on algae in the aquarium.

  • Check and, if necessary, reduce the lighting time, give your plants a “lunch break” without lighting and replace outdated neon tubes.
  • If the pool is exposed to direct sunlight, the side facing the sun should e.g. B. can be darkened with adhesive film.
  • Remove dead plant debris, check stocking density, fertilizer dosage, and your feeding habits. Less is often more here.

If the “with patience and spit” method did not lead to success and the elimination of the thread algae worked, but they settled back in, make sure that existing plants continue to grow through a targeted supply of trace elements. Due to the increased growth, your aquarium plants need significantly more nutrients, which are no longer available to the thread algae.

Algae-eating fish and shrimp for the aquarium

If stocking density and the type of fish kept so far allow it, Nanocheirodon insignis or flag cichlids – the only fish known to eat filamentous algae – can be used. Amano shrimp also feast on filamentous algae and other green algae (Chlorophyta). However, the shrimp only eat the 2-3 mm long, tender, young shoots and unfortunately also the leaves of various aquarium mosses.

Products to combat thread algae

  • Dennerle S7 and Dennerle PlantaGold 7 – free from phosphates and nitrates, they promote plant growth
  • Filament Algae Kill by Dennerle – activated oxygen (hydrogen peroxide), breaks down very quickly into water and oxygen. Simply sprinkle on the thread algae. Contains neither copper nor organic herbicides, is free of chemicals, and absolutely harmless.
  • Algen-Ex by Aquality – without copper/other heavy metals, use over 4 weeks, increases plant growth/nutrient competition
  • AlgExit from Easy Life – harmless to fish, shrimp, snails, or plants, use over 4 weeks
  • Phosphate-Ex by Dennerle – a highly effective preparation to prevent algae by removing nutrients with lanthanum phosphate scavenger, long-lasting effect
  • UV-C clarifier – emits germicidal UV-C radiation that does not change the water parameters and has no effect on the filter bacteria

You can find suitable products in our fertilizer category in our aquarium plant shop.

We hope that we were able to help you with our information and tips on thread algae and how to combat them. What are your experiences with thread algae? We are looking forward to your comments!

Healthy plant growth is the basis for the ecological balance in the aquarium.

Conversely, the condition of the aquarium plants is an important indicator of whether the aquarium offers good living conditions for plants and animals. Therefore, you should regularly check the health and growth of your plants. However, beginners in particular are often not sure what to look out for. Go through the aquarium checklist about once a week and you’ve done the most important things for your aquarium plants.

Do the aquarium plants look healthy?

Take a look at your aquarium plants at regular intervals. Do they grow evenly and vigorously? Are they forming healthy new leaves and shoots? Even if you don’t have a green thumb yet, over time you’ll gain an insight into whether your plants are doing well.

Check the aquarium plants for abnormalities such as:

  • Discoloration of leaves (eg, yellowing or whitening, spots, or streaks)
  • Deformations of the blades (e.g. waves or bends)
  • Holes or black spots in the leaves
  • Growth in length (large distance between the leaves on the stems)
  • short stature (new leaves are very small in size)
  • Low propagation of the plant (e.g. with floating plants)
  • Increased dying of the leaves or shoot tips

While length growth is a sign of too little light, disturbed growth and changes in the plants usually indicate a lack of a certain nutrient.

If you notice signs of this type in your plants, you should find out what the plant needs and use water tests to check for nutrient deficiencies.

Are aquatic plants infested with algae?

Increased growth of algae in the aquarium is usually a sign that your aquarium plants are not doing well. If the water values ​​are not in balance, the lighting is unsuitable or if the aquatic plants do not have sufficient nutrients, this can inhibit their growth. Algae will settle for far less and thrive even under difficult conditions. Help the aquarium plants regain the upper hand! You can find tips on this in our article Algae in the aquarium
If you find that algae are growing on your aquatic plants, remove them manually and get to the bottom of the cause of algae growth as quickly as possible.

Is there snail damage on the aquarium plants?

Smaller snail species such as ramshorn or bladder snails are desirable stocks in most aquariums. They play an important role in consuming leftovers and do not normally multiply excessively. Aquarium plants are of no interest as a food source for most snails, as they feed on leftover food, growth, or algae.

However, if too much is fed, the snail population in the aquarium can increase rapidly. As a rule, it is only when there is a great shortage of food that the snails start eating healthy parts of the aquatic plants. However, it often looks as if snails are eating aquarium plants, as they devour dead and diseased plant parts. Alleged damage caused by snails can also be a sign that your aquarium plants are not healthy.

If you find a lot of snails in the tank, collect some of them regularly. Check the aquatic plants for signs of disease if you see a lot of feeding damage.

Are the water values ​​of the aquarium in the optimal range?

Not every aquarium owner constantly keeps an eye on the water values ​​in his aquarium and depending on which animals and plants are being cared for, this is not always necessary. However, it is also helpful, especially for beginners, to have an overview of the water parameters.

The most important water parameters include:

  • pH — This should be in the range of 6.5 to 7.5 for the vast majority of aquatic plants.
    The total hardness GH — It is in the aquarium-suitable range in most tap water. If the total hardness is well above 20 °dGH, we recommend water treatment with an osmosis system. For smaller, so-called nano aquariums, you can also use distilled water from the hardware store to mix with tap water.
  • The carbonate hardness KH — It is also referred to as temporary hardness. Depending on the carbon dioxide content and pH value, the carbonate hardness changes over the course of the day. Their influence on plant growth is only indirectly important.
    The nitrate NO3 — nitrate is not as problematic for plants as is often assumed. It is formed in the aquarium from the metabolic products ammonia (NH4) and ammonium (NH3), which are burned via nitrite (NO2) to form nitrate (NO3). Plants prefer to “eat” the ammonium. Unfortunately, this is rather short-lived. Therefore, the plants are forced to take up nitrate as a source of nitrogen. In concentrations above 50 mg/l, nitrate is toxic to fish and invertebrates. However, plants could easily tolerate even higher concentrations. With regular water changes, you should keep the nitrate content below 20 mg/l for the sake of the fish.
  • Nitrite NO2 — Nitrite is toxic to fish and plants and should therefore only be present in the aquarium in homeopathic doses. In a healthy aquarium environment, however, it is very quickly oxidized to nitrate by the ubiquitous nitrobacterium. A higher concentration of nitrite can only occur during the start-up phase of the aquarium. Therefore, fish should only be used after the so-called nitpick
  • Carbon dioxide CO2 — Carbon dioxide dissolves in water and supplies the plants with the necessary carbon for their biomass. A part is converted into carbonic acid H2CO3 in the water. This in turn plays a major role in the relationship between carbonate hardness and pH. However, it has only an indirect meaning for plant growth. Many plants also grow without the addition of CO2. However, you can clearly see from aquariums with CO2 fertilization that the plants produce larger and somehow healthier-looking leaves and shoots.
    Determine the values ​​with simple droplet tests that you can get from specialist retailers. You can also have your aquarium water tested in many specialist aquarium shops. The test devices that are used for this purpose are usually only worth buying for very ambitious hobby or professional aquarists.

For owners of demanding aquarium plants, a long-term CO2 test may be worthwhile, on which the carbon dioxide value can be easily read. So keep an eye on it all the time. You can also use the pH and KH values ​​to calculate the CO2 value. Useful tools and tables can be found online.

If the test result deviates from the desired values, take appropriate measures. By regularly checking the water values, you ensure that your aquarium plants always find optimal growth conditions.

Do plants need to be thinned or cut back?

Regular pruning and thinning out of the aquarium plants is part of plant care. As with all changes that are made in the aquarium, the following also applies here: smaller interventions are better than large changes. The latter damages plant growth and can have a negative effect on the ecological balance in the aquarium.

Conversely, this does not mean that you should tug at your aquarium plants as often as possible. Every reaches into the aquarium means stress for the residents and you are also doing the plants a disservice. It is best to do all the necessary work as part of the weekly plant care when changing the water.
These include, for example:

  • Floating plants should be thinned out regularly so that the tank is not darkened too much. If the floating plants multiply, this is a sign of a good supply of nutrients in the aquarium.
  • Prune stem plants if they get too long and replant the top cutting in front of the cut plant. This will branch out so that you gradually get a dense thicket of plants.
  • Many cushion-forming plants are grateful for regular pruning. In this way, all parts of the plant receive sufficient light. Cut back the plants where they grow too dense, preferably with aquarium scissors.
  • You can cut off the offshoots of rhizome plants, such as water calyxes, which spread too far in the aquarium or grow into other plants. Simply put the offshoots back in a different place.

Lend a hand where the plants overgrow too much so that the view into the aquarium is restricted. The same applies where the vegetation is so strong that parts of the plant no longer receive sufficient light.

Are there dead plant parts in the aquarium?

You don’t have to collect isolated yellow or decomposing leaves immediately – even if it may bother you visually at first glance. A withering leaf here and there is definitely part of a natural aquarium. The decomposing plant material and the microorganisms that settle on it can also serve as a source of food for the animals in the aquarium.

For this reason, many aquarium owners bring dried foliage into their tanks. It is an excellent source of food for shrimp and snails, for example, and has a positive effect on water parameters by lowering the pH value. It can remain in the aquarium until it has completely decomposed.

Remove dead plant parts from the aquarium when changing the water regularly. If you want to remove old leaves from plants, carefully cut them off with a very sharp knife or razor blade.

Are the aquarium plants supplied with fertilizer?

Fertilizing with liquid fertilizer plays an important role in the care of aquatic plants in the aquarium because many aquarium plants absorb nutrients with their leaves. Most aquarium owners fertilize as part of the water change. However, do not forget that the water that is not exchanged also loses nutrients. If there is no water change, it should also be fertilized regularly.

Does the aquarium fertilizer according to the manufacturer’s instructions and be careful not to use too much fertilizer. Also remember to regularly supply plants that get their nutrition through the roots with fertilizer balls or tabs, unless this is ensured by a nutrient medium. If you are caring for demanding aquarium plants, you will also not be able to avoid CO2 fertilization.

It can be helpful, especially for beginners, to check the nutrient supply in the aquarium using water tests and, for example, to measure the iron value (Fe) in addition to the basic water values. In this way, you do not only notice a nutrient deficiency when it becomes visible on the plants – and you can always offer your aquarium plants optimal conditions.

Keep an eye on your aquarium plants and the nutrient content of the water. Fertilize regularly as much as necessary and pay attention to the special requirements of your plants.
Do you have comments or questions about our aquarium checklist?
We appreciate your comments!

Tortoises prefer to eat dandelions, dandelion flowers, plantain, buckhorn, wild mallow, thistles, rocket, and nettles. Alfalfa, chickweed, and yarrow are also good turtle food, which turtles like to eat.

What can I feed turtles?

  • aloe
  • wild garlic
  • nettles
  • daisy
    Common lady’s mantle
  • cinquefoil
  • raspberry leaves
  • True Lungwort
  • Common evening primrose
  • yarrow
  • Chickweed
  • pansies
  • buckhorn
  • deadnettle
  • white clover
  • Big burdock
  • dandelion
  • plantain

It is important to pay attention to a few criteria when selecting forage plants. For example, the different plants should not grow directly on the side of the road where there are many cars. These plants are too dirty. In addition, the individual herbs should of course also not be poisonous.

You should also make sure that the meadows are not fertilized, because fertilizer is often very toxic for the animals and, in the worst case, can even kill the turtles. Be sure to choose low-protein plants that are low in calories and low in carbohydrates.

It is also important that the plants contain a lot of fiber and provide the animals with many different vitamins. Calcium and minerals also play an extremely important role for turtles and are ingested through plant nutrition. If you look at the ratio of calcium and phosphorus, it should be 2:1, with calcium having to predominate. In addition, not only ensure a balanced and vitamin-rich diet, but also make it nice and varied. Always the same plants can quickly become boring for the animals.

What do turtles love to eat?

The majority of tortoises only eat plants. The feeding of tortoises should therefore consist of fresh plants, wild herbs and their parts. Particularly popular are: dandelions.

Can Turtles Eat Cucumbers?

Feeding meat, fruit, and vegetables should be avoided, as the tortoise’s digestion is not designed for this and in the wild, they are rarely or not at all eaten. HARMFUL and therefore not to be fed are bananas, apples, pears, tomatoes, and cucumbers.

What kind of salad can turtles eat?

Nevertheless, you can feed lamb’s lettuce to tortoises. Composition of lamb’s lettuce (according to SOUCI et al. 2000). Red lamb’s lettuce is called lamb’s lettuce, but it is not lamb’s lettuce, but belongs to the Romaine lettuce (and thus to head lettuce).

What happens when turtles eat cucumbers?

Cucumbers contain a lot of water and relatively few nutrients. In addition, turtles should not be fed only soft leaves as it does not require any effort from their jaws. This can cause the “beak” at the front of the mouth to overgrow.

Can turtles eat bread?

Rolls or bread soaked in milk are not species-appropriate and therefore not healthy complete food for tortoises.

Can Turtles Eat Bananas?

Fruits and vegetables Fruits (e.g. bananas, melons) and vegetables (especially tomatoes) are delicacies and must be fed in moderation. They contain too much sugar, have a bad calcium-phosphorus ratio (Ca:P) and can lead to digestive disorders.

What do turtles like?

Tortoises prefer to eat dandelions, dandelion flowers, plantain, buckhorn, wild mallow, thistles, rocket and nettles. Alfalfa, chickweed and yarrow are also good turtle food, which turtles like to eat.

Can turtles eat carrots?

For example, hay, clover, bindweed and chamomile are suitable foods. Only rarely should vegetables such as zucchini or carrots be fed. According to the experts, ready-made food as a dietary supplement is usually unsuitable.

How often do turtles need to drink?

In captivity, we bathe our Greek tortoises in crates in lukewarm water for about half an hour every other week, under supervision of course.

How often do I need to feed my turtle?

Adult turtles should be fed animal food about twice a week, juveniles every two days. Note: Since turtles do not usually stop eating on their own, you cannot use your turtle’s eating behavior as a guide as to whether it is full or not!

What do Greek tortoises drink?

The young animals tend to form humps in the shell if they grow too quickly. Tortoises are unable to drink from deep water bowls, so ensure that shallow water bowls are provided in which to immerse their mouths. As a rule, the animals drink while bathing.

Can Turtles Eat Tomatoes?

Every turtle loves them, unfortunately they are on the “red” list for these animals. We all know tomatoes are not suitable turtle food.

Can turtles eat melon?

Turtles are allowed to eat watermelon and also benefit from the high water content and nutrients. Watermelon can therefore also be included in the diet in small amounts.

Can Turtles Eat Parsley?

European tortoises feed on plant food: ready-to-eat food (plant pellets) for tortoises, flowers, herbs: e.g. B. dandelions, daisies, buttercups, yarrow, plantain, coltsfoot, meadow grass, parsley, dill (in winter alternatively hay cobs, lamb’s lettuce, sprouted chicory).

Can Turtles Eat Kohlrabi?

Of course you can also do something good for the turtle with some vegetables from time to time. Carrots in pieces or kohlrabi leaves are eaten with pleasure.

Are Dandelions Good for Turtles?

Dandelion is THE food plant for tortoises. Almost all of the animals literally pounce on leaves, flowers and stems with ravenous hunger. Dandelions are also found in the natural habitat of European tortoises.

How much do tortoises eat a day?

In summer they are all in a common outdoor enclosure, where they are fed a total of 70 to a maximum of 100 g of green fodder every day (wild herbs, occasionally cabbage, carrots, rarely lettuce, no fruit, no tomatoes, etc.).

Can you overfeed a turtle?

The wrong food can lead to intestinal parasite infestation, deficiency symptoms and various other diseases. You should also never overfeed the tortoises, as rapid growth can lead to fatty heart and liver and various bone structure problems.

Can Turtles Eat Grapes?

Other plants that are at the top of the menu are dandelion, stinging nettles, endive, lucerne and various types of grass, lettuce and thistle. In addition to this, you should also offer herbivores unsprayed fruit and vegetables such as cucumbers, tomatoes or even bananas and grapes.

Why is my turtle burrowing?

In winter, the tortoises go into what is known as hibernation, which usually lasts from November to March. When this begins, the tortoises bury themselves in the foliage and drift off into a deep sleep. The best temperature for hibernation is between five and seven degrees Celsius.

What do turtles eat water?

Duckweed, water lettuce, water lilies, frog bites, pond liverwort and dandelion are very popular. Some of these, such as duckweed, should always be in their tank. However, you should definitely refrain from feeding fruit and vegetables.

Which salad shouldn’t turtles eat?

Iceberg lettuce is like lettuce. Inexpensive and available everywhere, it still does not meet the feed quality for the animals. This salad has no usable ingredients for tortoises.

Can you give strawberries to turtles?

So, can turtles eat strawberries? Turtles are allowed to eat strawberries in small amounts. These delicious red fruits are by no means harmful to your turtle. But one should not overdo it and strawberries should only be fed as a snack.

Can Turtles Eat Raspberries?

Two two-year-old offspring of Greek tortoises eating a raspberry. Raspberries contain almost 85% water, which prevents dehydration. Recent investigations and biotope observations put the occasional feeding of different types of fruit in a new light.

What herbs do tortoises eat?

  • dandelion
  • nettle
  • buckhorn
  • Meadow bedstraw
  • plantain
  • daisy
  • deadnettle
  • poppy
  • garlic mustard
  • sowthistle

What do snapping turtles eat?

Food. Snapping turtles spend a lot of time at the bottom of water bodies, sometimes buried in mud, lurking for prey. However, they are also good swimmers and actively prey on fish, amphibians, reptiles and waterfowl.

What do turtles eat in minecraft?

An important resource for luring, breeding, and raising Turtles is Seagrass, as it is the only kind of vegetation that these small reptiles eat in the game.

What do green sea turtles eat?

Adult animals mainly eat seaweed and algae. Occasionally, however, also sponges, invertebrates and discarded fish.

What do box turtles eat?

Most (80-90%) of the plant material fed to box turtles should be vegetables and flowers, and only 10-20% should be fruit. As a rule, dark, leafy greens should make up the largest part of the diet. Yellow, red, and orange vegetables can also be included.

What do painted turtles eat?

Painted turtles feed mainly on plants, small animals, such as fish, crustaceans, aquatic insects, and some carrion.

What do hawksbill sea turtles eat?

Hawksbill turtles are omnivorous (feeding on both plants and other animals), but their preferred food in many areas is sea sponges. They will also eat marine algae, corals, mollusks, tunicates, crustaceans, sea urchins, small fish, and jellyfish.

What do leatherback turtles eat?

Leatherback: Leatherback turtles are often known as gelatinivores, meaning they only eat invertebrates such as jellyfish and sea squirts. Flatback: This species will eat everything from seaweed to shrimp and crabs.

What do baby turtles eat?

Do not give the animals too much fruit and also little dry food – otherwise young turtles in particular will quickly become overweight. Wild herbs, grass or hay are better suited.

What do baby river turtles eat?

Along with that they can be fed aquatic plants (such as Water Lilies, Water Hyacinth, Duckweed, Anacharis, Water Lettuce, Water Fern, Pondweed, Water starwort, Hornwort, Water milfoil, and Frogbit), vegetables (such as Zucchini, Squash, Collard Greens, Beet Leaves, Endive, Romaine, Red Leaf Lettuce, Kale, Escarole.

Brush algae, like all algae in the aquarium, are caused by an imbalance. In this case, there is a nutrient imbalance. The unloved type of algae occurs mainly when fertilization is too high, especially when iron fertilization is too high. But other factors can also promote the growth of brush algae. You can find out what these are and how to get rid of the algae here.

Brush algae – appearance and behavior in the tank

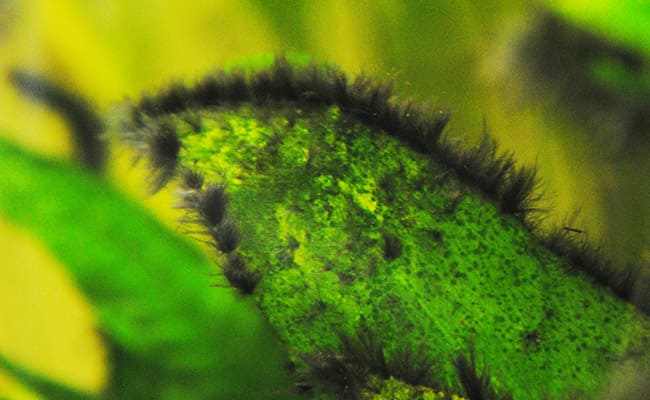
Brush algae belong to the group of red algae. Their color palette ranges from deep black through all shades of gray to dark green. Visually, brush algae resemble small brushes and have a bushy appearance.

One thing brush weed has in common with bearded is that they mostly attach themselves to hardscape – i.e. to furnishings and decorative objects that are more or less static in the tank. They are very tight and difficult to remove.

The housing of internal filters, stones, or roots is therefore the preferred settlement site for brush algae. Brush algae also love places with strong currents. Occasionally they also grow on slow-growing plants such as Anubias and Microsorum. They usually cannot be plucked off without damaging the leaves of the aquarium plants.

Identify red algae

A simple test to determine whether the “subtenant” is a red alga: put a sample of the alga in alcohol. If the alga turns red, then it is a red alga. Their growth habit should then facilitate further identification.
Common causes for the appearance of brush algae
Brush algae can be found in all types of aquariums – they conquer densely planted aquascapes as well as sparsely planted fish tanks. However, brush algae do not seem to spread through flying spores. If they suddenly appear in the aquarium, they have definitely been brought in by plants, decorations, or water from other aquariums.

Three factors favor the mass spread of this stubborn algae:

Pollution of the water

In pure fish tanks with a high stocking density and only sparse planting, the black brush algae often occur. Heavy feeding and the resulting high organic load, possibly favored by too few or too few water changes, create conditions in which the black brush algae feel very comfortable.

Another possible reason for the occurrence of brush algae is the accumulation of sludge in the substrate or in the filter. The simplest way to counteract this is to clean the soil from sludge by vacuuming or washing out the filter material.

Low carbon dioxide content

The lack of a CO2 system can also be responsible for the occurrence or growth of brush algae. The level of free carbon dioxide (CO2) in the water plays an important role in the occurrence of brush algae. If the aquarium water contains too little CO2, red algae and thus also the brush algae are able to satisfy the need for carbon from hydrogen carbonate much more easily than higher aquatic plants.

Hydroxide ions are formed by splitting off the carbon from the hydrogen carbonate ion, which increases the pH value. This triggers what is known as biogenic decalcification: Lime (calcium carbonate) is released, which the brush algae build into their cell walls, making them harder and less attractive to predators.

High iron content

If fertilizer is used with a complete iron fertilizer, it is advisable to reduce the amount. With a reliable test method, the iron content should be tested. If the aquatic plants develop very light shoot tips when the brush algae appear – a sign of iron deficiency – we recommend switching to a weaker complete iron fertilizer. It may be worth switching to pure iron fertilization without trace elements.

Brush algae and the solution to the problem

The right fertilizer for brush algae

If brush algae have spread in your aquarium, you should only use complete iron fertilizer very sparingly. Only use it when the taller plants show signs of deficiency in the form of yellowish leaves.

For fertilization we recommend instead:

  • Plant Growth Premium (a complete fertilizer for aquatic plants from Tropica)
  • Plant Growth specialized (an iron-free macronutrient fertilizer from Tropica)

Control of brush algae

You can also combat brush algae directly. Easy Carbo from Easy Life is suitable for this, which you simply add to the aquarium. According to the manufacturer’s instructions, use 1 to 2 ml per 50 liters of aquarium water.

After a few days of treatment, the brush algae should take on a whitish to pink color. Now you can stop the treatment. The dead algae can now be eaten by algae-eating aquarium inhabitants, such as ramshorn snails or Amano shrimp.

Fogging with Easy Carbo or hydrogen peroxide offers a more targeted application.
Draw a usual daily dose into a syringe and spray brush algae directly under water. Filters or flow pumps should be switched off for a few minutes. Please note, however, that sensitive plants – especially mosses – can react sensitively to the treatment.

Preventive measures against brush algae

The course of brush algae spread is always the same. If you walk through the pet shops with your eyes wide open, you will often notice decorative objects in poorly maintained facilities, which are overgrown with brush algae on the edges. Due to the often common central filtration and non-disinfected nets, the algae are spread throughout the facility.

If you transfer an “infested” stone or a root from such a system to a previously brush algae-free tank, the algae show up after a while first in the areas exposed to the current. The filter spout is very popular here. When the algae reach a certain age, tiny spores are formed, which spread throughout the tank and colonize any suitable spot. If at all, the fight can only be won with radical measures.

The spread can also be counteracted by preventive measures.

UVC sterilization has proven to be particularly effective. The water is run through a UVC sterilizer, killing the algae spores.

Combat brush algae with UVC sterilizers

There are these devices for aquariums and for garden ponds. The sterilizers for ponds are significantly cheaper. We use devices with 5 to max. 11 watts. The effect is amazing. The water is crystal clear after a few days and no new brush algae settle. The older algae foci are removed as far as possible. Affected plants are either treated with Easy Carbo or replaced completely.

Decorative objects can be taken out of the basin, rubbed with salt, and brushed thoroughly under running water after a day.

For the future:

  • never, never, ever put objects or plants from aquariums with brush algae into your own tank.
  • When introducing fish, never pour the water into the aquarium.
  • Always disinfect landing nets from “brush algae aquariums” or only use them for these aquariums.

We hope that our information and tips will help you to combat brush algae.
What are your experiences with brush algae? We are looking forward to your comments!

Beard algae belong to the red algae. They sit on aquarium plants and objects and, especially when they are young, bear some resemblance to brush algae. Beard algae are very stubborn, which is why it is not always so easy to drive them out of the aquarium for good. We’ll show you how to do it here.

Beard Algae – Appearance and Behavior in the Tank

Beard algae only show that they belong to the red algae group when they are placed in alcohol: this is when the typical red color comes to light. In the aquarium, they show up in all imaginable shades of gray up to black. They resemble brush algae in appearance but have much longer growths that float in the current like hair. Beard algae can reach a length of several centimeters in the tank. The longer such a “hair” becomes, the more likely it is to ring and curl – just like a long whisker. Beard algae love currents and therefore often settle on the filter or on plants or decorative objects near it.

Common causes of beard algae in the aquarium

Unfortunately, once beard algae have spread in the aquarium, it is often difficult and time-consuming to get rid of them. So the rule is: prevention is the better thing to worry about – as always when it comes to algae.

Keep these factors in mind to prevent algae from forming in your aquarium. The aquarium inhabitants and aquatic plants will also thank you for that.

  • Adjusting the stocking to the size of the tankless is more.
  • Don’t overfeed and have a “fast day” once a week.
  • This corresponds to the natural diet of fish.
  • Carry out sufficient, preferably generous, water changes regularly.
  • Plant your aquarium as lavishly as possible – preferably with fast-growing plants.
  • Illuminate your tank so that it meets the needs of animals and plants.
  • Fertilize your aquarium plants with CO2.
  • If possible, sterilize the aquarium water using a UVC lamp. This also prevents all other types of algae.

Beard algae and the solution to the problem

Beard algae grow very firmly with the substrate you have chosen so that it is almost impossible to pluck them off completely. By removing it by hand, you can bring your aquarium back into shape optically, but there are almost always remnants of the beard algae. New algae soon form from these residues, which quickly recover and blossom again. So this method alone is not enough.

We advise you to take these measures to combat beard algae:

  • The first thing you should do is either throttle the current in the aquarium or change the direction of the current. Since beard algae are very affine with currents, this is certainly a first step in the right direction.
  • If individual leaves of your aquarium plants are affected, you should remove them rigorously. If several leaves of a plant are affected, it is advisable to pinch off the plant just above the ground or to remove the entire plant.
  • Once bearded algae have settled on ornamental items in the aquarium that can be easily removed, removal is a little easier, provided the items can withstand high temperatures unscathed. Items should be boiled, then rinsed thoroughly, and scrubbed until completely clean. It is best to repeat this process. Only when the decorative item has been completely freed from the beard algae can you put it back in the basin. If you are not sure whether you were able to remove all the beard algae, it is better to dispose of the decorative parts.
  • Particularly beautiful stones or roots that you would like to keep can be covered with a layer of table salt approx. 5 mm thick, even when wet. The hygroscopic effect of the salt deprives the algae of water and they die. We also destroy algae residues in the adhesive edges of older aquariums before they are replanted after general cleaning.

The removal of the beard algae becomes difficult when, for example, stone structures firmly bonded to the glass or the bottom of the tank are infested with beard algae. In this case, consider whether a complete redesign of the aquarium would be a sensible solution. In this pool, you can create conditions right from the start that prevent beard algae from forming in the first place.

Algae-eating animals to control beard algae

Some types of snails, shrimp, the Siamese Algae Eater, or the Netweed Algae Eater are also suitable for preventing and combating algae.

However, only acquire these animals if you are also interested in caring for the animal itself and you have the right conditions in your aquarium. The Siamese Algae Eater is up to 15 centimeters long, the Netweed Algae Eater can reach a length of up to 17 centimeters. If you have the opportunity to care for these animals, they can be of great help in the fight against beard algae.

We hope that we have been able to help you with our information and tips on beard algae and how to combat them. What are your experiences with beard algae? We are looking forward to your comments!