Tag

Aquarium

Browsing

Red algae are particularly unwelcome guests in the aquarium. They appear here as brush algae and beard algae – and are among the more stubborn representatives of algae. Here you can find out how to combat red algae, identify them correctly and prevent a dreaded red algae plague.

What are red algae?

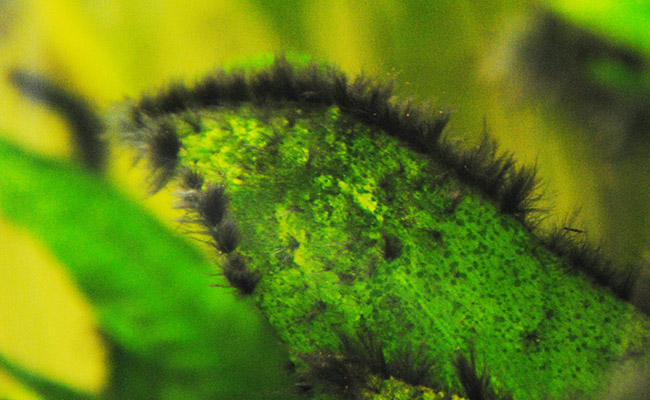
If you are dealing with red algae for the first time, you may be surprised: the types of red algae that occur in the aquarium do not really look red. Rather, brush algae and beard algae appear in a spectrum of dark colors from gray to black. Reddish, brownish, or greenish coloring can also occur. They only reveal their red color when they come into contact with high-proof alcohol. To reliably distinguish red algae from green algae, a test with alcohol is often very helpful. Because a green alga can, depending on its growth form, look very similar to a red alga.

Which red algae do I have in the aquarium: brush algae or beard algae?

If you were able to successfully identify the algae in your aquarium as red algae, they belong either to the brush algae or to the beard algae. As a rule, these types of algae can be easily distinguished from one another visually: their name describes the typical growth form very well. However, because brush algae and beard algae look very similar in principle and their color and preferred occurrence are the same, confusion can occur. When determining the red algae, pay attention to the following characteristics.

Combat red algae: be thorough

Red algae have a particularly bad reputation among the algae species. It is often difficult to get rid of them because they grow very firmly into the ground. If you remove them mechanically, there is always a residue. This allows the red algae to spread again quickly. It also spreads quickly by being introduced from other aquariums. Therefore, if red algae appear in your aquarium, you should not waste any time and take appropriate measures immediately.

Remove red algae from aquarium plants

Red algae are often so attached to aquarium plants that they cannot be detached from the leaves without damaging them. It is therefore best to completely remove heavily algae-covered leaves. If in doubt, you should get rid of heavily infested aquarium plants in order to get rid of an advanced red algae plague. If you have to remove a lot of plants, provide replacements: Temporarily plant a few fast-growing aquarium plants (such as waterweed or chickweed). These are robust, cheap to have as aquatic plants in the bundle, and can be exchanged for more demanding aquarium plants after the algae plague has been successfully combated.

Remove red algae: hardscape and substrate

If the algae have attacked stones or roots that you can remove from the aquarium, you are in luck. You can boil them thoroughly and then clean them with a brush. This is how they remove red algae that are clinging to it. If, for example, firmly bonded stone structures or even the substrate are infested, the removal is conceivably more complex. It can even make sense to do a complete reinstallation. You can find out more about the occurrence and combat of brush algae and beard algae in the article on the respective type of algae.

Algae eaters against red algae

Algae eaters such as fish, snails, or shrimp can help to combat algae. They are even more important in preventing red algae infestation. Unfortunately, this is not necessarily the most popular type of algae on the menu of most animals. Only select algae eaters for the aquarium are known to eat red algae. It is best to get rid of the thought that you are putting a troop of algae eaters in the aquarium and they will simply eat your algae. Rarely is it that simple?

Red Algae: Prevention is the best way

Fighting red algae is very time-consuming. Therefore, the golden rule applies all the more to this type of algae: it is better to prevent algae than to fight them. Even after the algae have been successfully removed, you should check all parameters in the aquarium to avoid re-infestation.
With red algae, make sure that you never move plants or objects from one infested tank to another. Remember that the algae also adhere to the aquarium technology. Likewise, the landing net can be the culprit when it comes to red algae transmission. It is either important to pay attention to the most thorough hygiene (by means of disinfection) or to strictly separate the objects for different aquariums.

We hope that we have been able to help you with our information and tips on combating red algae in the aquarium. What are your experiences with this type of algae? We are looking forward to your comments!

Anyone who buys new aquarium plants pays attention to healthy, strong plants. When placing them in the aquarium, there are a few things to consider so that the aquatic plants feel comfortable right from the start. In this way, you ensure that the pupils thrive and are not unnecessarily weakened or injured. We will tell you how to use plants in your aquarium and what you need to pay attention to when planting and preparing.

Put plants in a bunch in the aquarium

If you would like to use plants in the aquarium that you bought in the bundle, proceed as follows:

  1. Shorten the cuttings down to the healthy tissue.
  2. Remove the bottom two leaf knots. One to two centimeters of the petiole can remain.
  3. Plant the bundle plant for the aquarium in such a way that the lower nodes, but never the leaves, are buried.

Tip for the right cutting before you put the plants in the aquarium: The stalks of the bunch of plants should not be crushed. It is best to use very sharp scissors or a razor blade. Never pinch off the stems of the aquarium plants with your fingernails. This will damage the plant. Rotting may occur after being placed in the aquarium. In the worst case, the entire aquarium plant dies.

Some bunch plants come with a lead band or ring. They serve to keep the plants on the ground in the sales tank. If you want to use ringed plants in the aquarium, we advise you to remove the ring or the lead sleeve and follow the steps above.

Vallisneria in the aquarium: insert and prepare plants

Plant Vallisneria correctly? Putting this popular aquarium plant in the aquarium is not difficult:

  1. Before planting the aquatic plants, remove the outer leaves.
  2. Any kinked sheets will be shortened up to the crease.
  3. The roots are only left long enough for the aquatic plants to find enough support in the ground. Vallisneria usually forms new roots after they have been placed in the tank – the old roots are no longer needed and die off.

Place plants in the grid pot in the aquarium

If you want to use aquarium plants in pots, follow these steps:

  1. Carefully free the aquatic plants from adhering aquarium plants under running water
  2. Cut the roots of the plants to four centimeters.
  3. Damaged and older leaves are removed.
  4. Form a small planting hole in the bottom of the aquarium and place the plant in such a way that the roots are not bent. If you use a rosette plant in your aquarium, make sure that the base of the leaves is slightly above the substrate.

Tip for Rockwool on aquarium plants: Aquarium plants in pots are usually grown in Rockwool. This is a harmless, natural material that does not release any substances into the water. Nevertheless, we advise you to remove the rock wool before you put the plants in the aquarium – because it acts as an optical disturbance in the tank. Every now and then, bottoming fish expose the beginnings of the aquatic plants or the substrate is moved during the weekly plant care in the aquarium – and the rock wool is already exposed.

We are often asked whether aquarium plants can be used in pots. We would advise against placing the aquarium plant with the pot in the substrate. The roots need space to develop and pots protruding from the substrate look ugly.

Epiphytes in the aquarium: insert and fasten properly

Epiphytes for the aquarium include all plants that are not planted but attached to decorative objects. These include:

  1. Anubias (dwarf spear leaf)
  2. Microsorum (e.g. the popular java fern)
  3. Bucephalandra
  4. Aquarium moss

If you want to properly plant epiphytes that have been grown in a pot, you only have to consider a few things:

  1. Carefully remove the aquarium plant from the pot.
  2. Remove adherent rock wool.
  3. Attach the epiphyte to a decorative rock or root.

When planting moss in the aquarium, make sure that the moss is only tied up in one layer. Avoid the stalks overlapping each other or even forming clumps. So the moss grows nice and dense.

Hornwort in the aquarium: insert and prepare plants

Hornwort is a special case in the aquarium when it comes to planting: This aquarium plant, which is also popular as a pond plant, only develops small adhesive roots. Hornwort is not particularly suitable for planting on the substrate. Therefore, if you want to use these plants in your aquarium, you must follow a few tricks:

If you plant chickweed, it will break off quickly if there are robust or larger fish in the aquarium.
The lower parts of the stem quickly turn brown and unsightly. To get a nice look, the chickweed would have to be constantly shortened and replanted.
How to properly plant chickweed in the aquarium? Best not at all. Let it float freely in the water and attach a piece of fishing line or a star sucker to hold it in place if necessary. If there are larger fish or a strong current in the tank, this is certainly recommended.

After placing the plants in the aquarium: don’t forget the fertilizer

If the plants are used in the aquarium, you should first let them grow for a week. After that, you can give the newcomers a portion of fertilizer so that they develop strong roots and new foliage quickly.

Fertilizer capsules have proven to be a good fertilizer for the aquarium. This is a depot fertilizer. That is, the nutrients are released over a longer period of time (several weeks).

  • A good soil fertilizer, e.g. B. substrate fertilizer for the aquarium with long-term effect introduced. This is available in the form of convenient capsules or tablets.
  • You will need one tablet or capsule per larger plant (such as Cryptocoryne, Echinodorus, Hygrophila, etc.).

Since the long-term fertilizer is released to the plant over a longer period of time, it is only necessary to fertilize the aquarium plants again after two to three months.

This makes it easier for your new aquarium plants to grow in the aquarium after planting.

Do you have any questions or comments on the topic “Aquarium: inserting and preparing plants”? We welcome comments!

Mosses are among the most popular aquatic plants in the aquarium. Their fascinating appearance, the many possible uses, and their ease of care make them so popular. Once you have chosen a few nice varieties, it is time to attach the moss. Which method is the best? We explain how it works and give you some useful tips.

Fastening moss – tying it up or sticking it down?

Which method is best for fixing moss in the aquarium naturally also depends on where the plant is to grow. Basically, the following methods are available for aquarium mosses:

  • plant roots
  • plant stones
  • Green the back walls
  • Use as ground cover

Glue the moss with underwater glue

This variant is particularly practical. Gel moss glue also sticks to damp objects. You get it in small tubes that are easy to handle. It is very versatile and when it comes to fixing moss in the aquarium, it is clearly the first choice. The moss is not damaged, can be applied precisely, and has a firm hold on any surface. Even demanding aquascaping projects can be realized precisely with moss glue.

Untie moss

A fishing line or another thin nylon line is suitable for tying up moss. Spread the moss on the desired item. The small moss branches should be in a maximum of two layers on top of each other on the surface. If the layer is too thick, the plants below will die. Now carefully wrap the string around, not too tight, not too loose. The fine branches must not be damaged, but the moss should be in contact with the object on which it is to grow. You can also sew the moss onto a filter or pond mat using an embroidery needle with individual coarse stitches.

String or twine are only suitable for tying up plants to a limited extent, as they expand over time and the moss loosens if it has not yet grown firmly. The advantage is that it is quickly at hand – a practical solution when things need to be done quickly.

Fix moss with a hair net

This method is particularly suitable for stones. Place the moss on top, pull the hairnet over it and pull tight. Trim if necessary and secure with nylon or a fishing line. Nets in dark colors are barely visible underwater. The plant grows out of it as a dense cushion, so that it is soon no longer visible.

Stuck moss in the aquarium

You can also carefully pinch the plants in the hardscape between rocks and roots. After a while, the mosses will grow there. At first glance, this method is very simple. However, the moss must have good contact with the surface in order for it to hold. If the branches are drifting in the current or if fish are tampering with them, it can take a long time. In addition, the parts that do not receive light will die. We, therefore, advise you to attach larger amounts of moss better with another method – so you have the most of the pretty plants.

Fix moss with a suction cup

Sometimes single, bare spots in aquaria are disturbing. A great trick is to fix smaller tufts of moss in the aquarium pane with suction cups. Use a star sucker for this, which you can get in aquaristics shops. Simply pull the moss through the ring and attach it to the aquarium pane. This method is particularly well suited to temporarily concealing a gap in the planting.

No matter which variant you choose: Start with a sufficient amount of moss – especially if you want to cover larger areas. Since mosses grow very slowly, it usually takes a long time for a nice cushion to form. Each branch doubles in size within three to four weeks. The difference in starting with a handful of moss instead of a small portion can be easy to calculate.

What is your method of fixing moss in the aquarium? We look forward to reports and comments!

A sight that most aquarium owners are familiar with – and many even fear: the aquarium plants are turning brown. There can be many reasons why plants in the aquarium turn brown. Some of these are completely harmless, others can be an indication of a care or transport error. If you want to know the reasons why aquatic plants turn brown, you should read here. We give you a brief overview of the most important reasons why the plants in the aquarium turn brown.

Aquarium plants are turning brown – cause #1

Air leaves are dropped

Most of the plants that we keep in our aquariums are not “real” underwater plants but grow emersed in nature – i.e. above water – for example in swamps or wet areas. If there is heavy rainfall, such as in the tropics during the rainy season, the regions where the plants grow are flooded. The marsh plants are now in the water and immediately adapt to the new conditions:

  1. The plant forms new, physiologically differently built underwater leaves.
  2. The old air leaves turn brown over time and are shed by the aquatic plant.

This is why new aquarium plants often turn brown after being planted. The nurseries produce the aquarium plants in greenhouses. If they are used in the aquarium, the same process takes place in nature. Many aquarium owners do not know that most of the plants that are grown for the aquarium grow emersed. You think the aquarium plants are turning brown because they are sick, but there is no need to worry.

Aquarium plants are turning brown – cause #2

Mechanical damage caused by aquarium inhabitants

If you notice that the aquarium plants are turning brown, you should take a closer look at the leaves of the affected plants: Mechanical damage can be a cause of the aquarium plants turning brown. Above all, the aquarium inhabitants are responsible for:

Snails tirelessly scrape the surfaces in the aquarium with their eating tools. The upper skin of the leaf, the epidermis, can be scraped off.
Suction catfish, which are very popular algae eaters in the aquarium, can also damage the epidermis of the leaves.
Due to the damage, an affected leaf initially turns brown and can then die off. When setting up an aquarium, you should therefore always adapt the aquarium plants to the existing stock. The plants for perch aquariums, for example, differ greatly from the plants for a discus aquarium or the varieties that are chosen if you want to set up a shrimp aquarium.

Aquarium plants are turning brown – cause #3

Iron deficiency leads to discoloration of the aquarium plants

When was the last time you determined the iron level in your aquarium? If you notice that the leaves of the aquarium plants are changing color, you should do it. With an iron deficiency, the leaves of the aquarium plants do not turn brown, but they do turn yellowish, look unhealthy, and are hardly green anymore. Due to acute iron deficiency, the aquatic plant is not able to form chlorophyll.

Aquarium plants are turning brown – cause #4

Diatoms or brown algae are in the aquarium

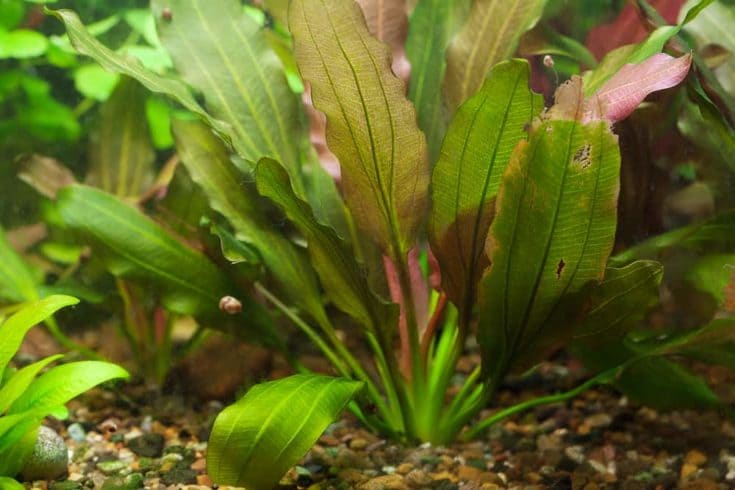
Have you ever looked closely when you noticed that your aquarium plants are turning brown: is it really the leaves themselves that are turning color? If there is a brown layer that can be easily wiped off with a finger, the aquarium has diatoms. They are also called brown algae because of their brown color. They like to appear after a new setup of the aquarium or after large water changes. However, not only do the leaves of the plants in the aquarium turn brown, but also surfaces such as windows or hardscapes. Brown algae is not a problematic type of algae in the aquarium. They usually go away on their own. Incidentally, the leaf of an Echinodore with brown algae infestation can be seen on the title page.

Aquarium plants are turning brown – cause #5

Cryptocoryne blight affects water chalice stock

If only the cryptochromes in the aquarium, but not the other plants, turn brown, it may be cryptocoryne rot, also known as water cup rot.

It partly ensures that entire stocks are destroyed in a short time. The leaves of the aquarium plants turn brown, literally fall apart and dissolve. The causes of cryptocoryne rot are controversial and there are various explanations as to how this phenomenon can occur. If one used to assume an illness, today external factors such as physiological disorders are usually cited as the cause. While some aquarists have no problem with this phenomenon, others report regular flare-ups every few years as the cryptocoryne turns brown and decays.

Aquarium plants are turning brown – cause #6

Vallisneria after insertion or transport

If a look into the aquarium shows that the Vallisneria are turning brown, while the other aquarium plants are thriving, then the Vallisneria was probably replanted not too long ago. These aquarium plants are very sensitive to transport. The outer leaves of representatives of this genus often die off after planting because the plant still has too few new roots to feed the entire leaf mass. Once the roots have formed in sufficient number and size, new, strong, green leaves will emerge. If Vallisneria turns brown, this can also be due to transport damage caused by heat or cold. But that’s easy to avoid. You can read tips on how to ship aquarium plants correctly in our little guide.

Aquarium plants are turning brown – cause #7

Light makes the leaves darken

Many plants form red-brown leaves close to the surface. If the aquarium plants turn brown at the tips of their shoots, this does not mean that they are dying – even if it often looks that way too inexperienced aquarists. The reason why the leaves of aquarium plants turn brown is the bright light on the surface. By storing brown pigments, the aquatic plant tries to protect itself against this. The process is similar to human skin, which also turns “brown” with increased exposure to the sun. The phenomenon is also easy to observe on leaves that stick out of the water, where the light hits them unhindered.

Do you have any questions or suggestions on the subject of “aquarium plants turning brown”? We appreciate your comments!

A lawn of small aquatic plants looks beautiful in the aquarium. The carpet of aquatic plants underlines the natural impression and increases the diversity of the underwater world. A large selection of lawn-forming aquarium plants is available: Different colours, textures and leaf shapes ensure a varied picture that captivates the viewer. Read here how to get a carpet of lawn-forming foreground plants in the aquarium as quickly as possible and how to care for them properly.

Plant lawn-forming aquarium plants correctly

To get a nice, dense lawn, a little preparatory work is necessary. There should be time, leisure and tact. Because it is important to first divide the purchased aquarium plant into many small plants and use them individually.

Simple rule of thumb:

The more of the small plants are planted individually, the faster a lawn forms.
The easiest way to plant the aquarium plants is to use aquarium tweezers. The small parts of the plant cannot always be easily anchored in the ground, as they have hardly any roots and are very small. Without tweezers, it is extremely difficult to place the plants in the planting hole so that they are held in place by the substrate. If you plant the next plant, ground cover that has already been planted is often uncovered again. With an aquarium tweezers you save yourself this frustration as much as possible.

The tweezers also have the advantage that they allow you to reach into the aquarium with your hands or arms as little as possible. This reduces the risk of foreign substances (e.g. from personal care products such as soap or creams) getting into the water. Whether you prefer to work with straight or angled tweezers for the aquarium is entirely up to you.

A smoother for the substrate can also be helpful. You can put the aquarium plant or the shoot into the planting hole with one hand and use the smoother to push the substrate with the other hand so that the plant sticks to the ground.

Steps for a dense lawn in the aquarium – this is how a green carpet is created in the foreground
needs of the aquarium inhabitants

Lawn-forming varieties should suit the aquarium.

For example, they are not the right plants for perch aquariums. If you keep fish that like to dig in the substrate, dig around or redesign the tank, an all-over lawn in the aquarium is not a good idea. In the aquarium for shrimp, on the other hand, it is in perfect hands and will offer the animals many advantages. So think about whether and how you can do your animals a favor with the lawn in the aquarium.

Choosing the plant for the aquarium floor

Decide on an aquatic plant species whose demands on the environment correspond to the conditions in the tank. Light and C02 requirements as well as the available space for growth must be right. Remember that by the time the light reaches the bottom of the aquarium, it has already greatly diminished in intensity. And also factor in larger plants that take the light out of the ground cover.

Correct insertion of the aquarium plant in the substrate

If you buy a pot of lawn-forming plants and use them in the aquarium without further ado, you will have to wait a long time for a lawn. It is better to plant the ground cover in such a way that they stand alone. For this purpose, the plants are professionally divided and the shoots are used individually.

Proper care of aquatic plants

Fertilize, thin out, cut to size, isolate or propagate – the care required depends on the selected plant species. Most ground cover plants are slow growing, so you don’t need to invest a lot of time. In contrast to the lawn in the garden, the lawn in the aquarium is rather easy to care for – this is quickly done as part of the weekly plant care in the aquarium.

Are you still looking for ground cover for the aquarium? Then take a look at our aquarium plant shop. Here you will find suitable products and information on the requirements and properties of the various foreground plants.

Do you have any comments or questions about lawn-forming aquarium plants?
We appreciate your comments!

In a functioning aquarium, organic material is broken down by microorganisms. Leftover food, dead plant matter or animal excretions are decomposed by bacteria. The end product of the nitrification chain is nitrate. The level of nitrate in the aquarium says a lot about the water quality and the biological balance.

The nitrogen cycle

Ammonia is excreted by the fish and reacts in the water to form ammonium. This is not toxic, but it can break down to highly toxic free ammonia at a pH above seven. Ammonia is broken down into nitrite (NO2). This in turn to nitrate (NO3).

Ammonia (NH3) > Nitrite (NO2) > Nitrate (NO3)

Ammonia: very toxic for fish (the optimal level is 0 mg/l, concentrations from 0.1 mg/l can be lethal for fish)
Nitrite: toxic for fish (the optimal nitrite level is 0 mg/l, concentrations of 1 mg/l and more can kill fish)
Nitrate: only toxic in high concentrations (values between 50 and 100 mg/l are still considered tolerable)

Too much nitrate in the aquarium: a warning sign

Too high a nitrate level in the aquarium is not directly dangerous, but it is an important warning signal. It is an indicator of poor water quality and maintenance. Because if the aquarium is in balance, there is only so little nitrate that the aquatic plants can absorb it and any excess is eliminated by regular partial water changes.

If you measure increased nitrate levels, you should look for the cause. Check equipment such as filtration and lighting, check the rest of the water parameters, make sure you’re caring for your aquarium and aquatic plants properly, and reconsider stocking and feeding habits. Otherwise you have to reckon with problems such as the formation of algae.

Reasons for too much nitrate in the aquarium

  • High stocking density
  • Overfeeding
  • Insufficient filter performance
  • Few or too slow growing aquatic plants
  • Poor aquarium care or not enough partial water changes

The optimal nitrate content in the aquarium

Nitrate plays an important role in the aquarium. Aquatic plants need nitrate as a nutrient. In good growing conditions, fast-growing plants absorb excess nitrate from the water. In the case of very heavily planted aquariums without stocking, fertilization with nitrate may also be necessary (up to 5 mg/l are consumed per day).

If there are too many decomposition products, or if there are too few plants, nitrate can accumulate in the aquarium. Limit values for the nitrate value in fish farming are discussed controversially and differ depending on the species. The following values are usually given:

Community tanks: 100 mg/l should not be exceeded in the long term, a value below 25 mg/l is recommended;

Plant tanks: 10 to 25 mg/l;

Shrimp tanks < 25 mg/l (<15 mg/l for high breeding);

Breeding tanks: The value should be as low as possible lie.

Measures to be taken if there is too much nitrate in the aquarium

Perform partial water changes to remove nitrate

The first measure to take when the nitrate level is too high is to change the water with low-nitrate water. It helps to quickly lower the nitrate in the aquarium, but is not a permanent solution. If you do not eliminate the causes, the value will quickly increase again.

Use aquatic plants that use nitrate as food

Ensure dense planting in your aquarium. Fast-growing aquarium plants absorb a particularly large amount of nitrate. Aquatic plants not only absorb nitrate, but also generate oxygen – which benefits the nitrifying bacteria, the plants and the inhabitants of the pool. They are an important part of the ecosystem in the aquarium.

Reduce stocking to reduce organic waste

In tanks in which many animals live and which may also be sparsely planted, there is often a particularly large amount of nitrate. Make sure your aquarium is stocked too high. The number and size of the fish and other tank inhabitants must match the aquarium size.

Use filter media against nitrate

Constant partial water changes are not a solution if you want to permanently reduce nitrate. Especially if the tap water itself contains a lot of nitrate. You can reduce the nitrate value in the aquarium in the long term by filtering. You can get high-performance filter media commercially that help remove nitrate from the water. There are two possibilities:

Biological filtration: Large numbers of nitrate-degrading bacteria can settle on the large surface of the porous filter material.
Ion exchanger: Resins as a filter medium bind nitrate ions, in return they release chloride ions into the water.

Frequently asked questions about nitrate in the aquarium

Is the nitrate in my aquarium too high?

That depends on the needs of the animals you are caring for. The nitrate level in the aquarium should normally be below 25 mg/l. Between 50 mg/l and 100 mg/l in the aquarium water are considered harmless for most fish. If the nitrate content in your aquarium exceeds 100 mg/l, you should carry out a partial water change and take measures to permanently reduce the nitrate.

How can I measure nitrate?

You can determine the nitrate value yourself quickly and easily at home with a droplet test or a test strip. These are available from aquarium retailers. Many dealers also offer their customers to test a water sample they have brought from the aquarium. The purchase of professional test devices such as those used here is only worthwhile for very ambitious hobby aquarists or professionals.

How often should I check the nitrate level?

It is advisable to regularly check the nitrate level in the aquarium before the partial water change. If there is a lot of nitrite in the aquarium water, the water change can be a little more generous. If the aquarium is running smoothly, experienced aquarists only rarely measure the water values ​​- especially after major changes in the tank or when problems occur.

How do I prevent too much nitrite from forming in the aquarium?

The best preventive measure is lush, healthy planting. If you offer the plants good growing conditions, they will absorb the nitrite from the water and convert it into plant matter. Another plus is that the increased oxygen production also supports the growth of beneficial bacteria.

If there is too much nitrate in the aquarium, fast-growing aquarium plants can also be used for a short time. Once the values ​​have stabilized, they can be gradually removed from the tank and replaced with other aquarium plants.

Is nitrate bad for fish?

Nitrate concentrations of more than 100 mg/l are harmful to fish in the long term. Above a certain concentration, there is an acute risk of reduction to nitrite. This can lead to an increased incidence of diseases. It also inhibits the growth of the fish and often causes problems in breeding.

Is nitrate bad for shrimp?

If the nitrate level in the shrimp aquarium is too high, this can cause molting problems in the shrimp. Too much nitrate in the aquarium inhibits the absorption of iodine, which the animals need to produce moulting hormones.

A value of up to 25 mg/l is considered appropriate, high breeds are kept at a maximum nitrate value of 15mg/l.

Is nitrate harmful to aquatic plants?

No, on the contrary. Nitrate is very important for plant growth because it is their source of nitrogen. However, if the nitrate level in the aquarium is too high, problems can arise that also affect the plants – which can promote algae in the aquarium, for example. With a nitrate content of more than 25 mg/l, reddish plants can lose their color and develop green leaves.

Do you have further questions about nitrite in the aquarium? We look forward to your suggestions and comments!

A natural aquarium is a special eye-catcher and makes the hearts of many aquarists beat faster. Anyone considering setting up a natural aquarium should not miss this article: Here you can find out exactly what a natural aquarium is, how you set it up, which aquarium plants are suitable and how it differs from other types of aquarium design.

What is a nature aquarium?

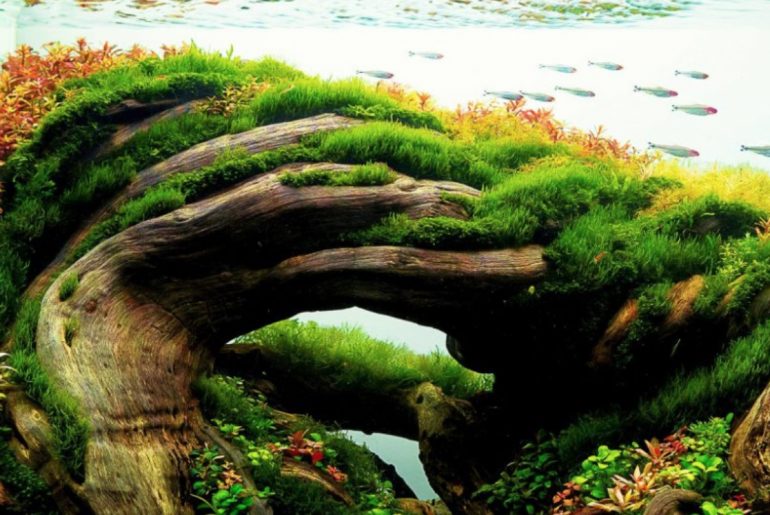
In the natural aquarium, the impression of a natural scenery is created without replicating it in detail. Plants, roots and stones create an overall picture in which the viewer can lose himself, just like in nature. There is room for playing with structures, contrasts, colours, shapes, light and shadow. Natural elements such as roots or stones are used for decoration. The main focus of the natural aquarium is on the planting.

Typical for a natural aquarium

  • Plants play the leading role
  • Lots of free space
  • Plain rear panel (single color film)
  • Natural decoration materials
  • Play with light and shadow

Natural aquarium and other aquarium types in comparison

Biotope aquarium

The term natural aquarium is often equated with biotope aquarium. However, the natural aquarium is about creating a natural scenery. A biotope aquarium, on the other hand, is a tank in which the natural habitat of an animal species is faithfully reproduced. A biotope aquarium can replicate the underwater world of Lake Malawi in Africa, or a South American mangrove area. From the selection of the plants to the substrate, the decorative materials and other furnishings such as leaves lying on the floor, everything in the biotope aquarium is adapted to this. Of course, the water values and other environmental parameters are also included – just like the right stocking.

Japanese natural aquarium according to Takashi Amano

A name that usually comes up in connection with the topic of nature aquariums is Takashi Amano. The Japanese has decisively shaped the aquarium scene and is not only considered the father of natural aquariums, but also of the aquascaping scene, which later developed from it. His cymbal layouts became groundbreaking. The terms Japanese aquarium or Japanese natural aquarium have therefore also become commonplace for the term natural aquarium.

Aquascape

Designing a natural aquarium is closely related to aquascaping. However, it is not the same thing. The term aquascaping is short for “acquatic landscaping”, which means something like “designing underwater landscapes”. Here landscapes from nature (above water) are reproduced. This can be a mountain landscape, a steppe, a hilly landscape covered with vegetation and much more. In aquascaping, mountains, hills, trees or entire forests are often created underwater in miniature format, which is less common in natural aquariums.

In the natural aquarium, on the other hand, there are no detailed “imitations”. It’s more about giving the impression of naturalness, drawing the viewer into the landscape and inviting him, like in nature, to let his gaze wander freely. Anyone who looks at the aquarium, for example, gets the impression of a wild thicket like in a forest – but without individual trees being reproduced as in aquascaping.

Naturaquarium

Impression of naturalness, rather low degree of realism — the overall impression is decisive. The viewer can freely interpret the landscape.

Aquascaping

High degree of realism, individual landscape elements are reworked in detail.

In a Dutch aquarium or Holland aquarium, plants play the main role – just like in a natural aquarium. However, the plants are used here in such a way that clear structures are formed, comparable to flower beds in the garden. The Holland Aquarium works with color contrasts and leaf structures, with geometric shapes such as lines or triangles.

In contrast to natural aquariums, Holland aquariums appear more structured and well planned when compared to a natural aquarium. Which design principle is preferred depends of course on your own preferences and individual taste.

Which plants for the natural aquarium?

One thing is clear: plants play the main role in the natural aquarium. But which plants are particularly suitable for planting in a natural aquarium?

Choosing the right plants for the natural aquarium

Of course, choosing the right plants depends on your own taste. However, there are some aquarium plants that are particularly suitable for setting up a natural aquarium because of their growth habit or other properties. Because it is by no means a question of simply using aquarium plants and letting them grow wild, as in nature. It is planned very precisely how natural scenes can be created with a selection of plants. How detailed you want to proceed is entirely up to you. Or maybe you just let yourself be inspired by some beautiful nature aquarium layouts for the design of your aquarium.

Nature Aquarium: Plants for the foreground

Plants that form a lawn in the aquarium are popular for the foreground in the natural aquarium. Depending on the size of the aquarium, grassy aquarium plants, such as New Zealand grass, form focal points for the eye or provide ground cover for the foreground and side areas of the tank. Lawn-forming aquarium plants also have the advantage of providing support for a mound structure in the aquarium when they root through the soil. Glossostigma is one of the aquatic plants that are used particularly frequently in natural aquariums. Overall, you have a wide selection of foreground plants for the aquarium.

Nature Aquarium: Plants for the middle ground

Which plants are suitable for the middle ground in a natural aquarium depends on various factors. Consider:

Planned pelvic layout: Should the central pelvic area have a generous amount of free space? Are you planning a “plant island” as an eye-catcher in the middle of the pool? Are roots or larger stone structures planned? Depending on how you answer these questions, you should choose background plants, pretty midground plants or epiphytes.
Aquarium Size: Find out what size the mature plants will be. Of course, completely different aquarium plants are suitable for the middle ground in a nano aquarium than for the middle area in a tank that holds several hundred liters.
Type of planting or attachment: should the plants be planted directly in the substrate, or would you like to attach epiphytes?

Nature aquarium: plants for the background

In many natural aquariums, the background is not planted. Instead, tall plants are used on the side or in the center of the pool. There are various reasons for this:

Optical depth: The impression of optical depth plays an important role in the natural aquarium. Therefore, a decorative or planted rear wall is not used. A black or milky film is usually used. Aquarium plants in the background of the tank can disturb the impression of depth. In the lateral areas, however, they are in very good hands.
Points of focus in the tank: In the natural aquarium there is often a focal point to which the observer’s gaze is drawn. Dense planting in the background would disturb this impression. However, background plants are ideal for creating this focal point – for example as a green island of plants in the middle of the aquarium.

Natural aquarium: Epiphytes

Epiphytes are a real must in a natural aquarium. They are the first choice to reinforce the natural impression. You should definitely green roots and stones with epiphytic plants in your natural aquarium if this suits your planned tank layout. This way, the decorative objects immediately appear much more lifelike. Just think of the difference between a root with and without moss planting.

We can particularly recommend moss for the aquarium: it gives the design filigree details. Moss for the aquarium is also ideal for greening stones, roots or even the substrate. Beautiful layouts can also be created with other classic epiphytes, such as Java fern or Anubias.

Tip: You can find out how to attach epiphytes in our article here on the blog.

We hope you enjoy choosing the right plants for the natural aquarium!

Anyone who discovers black algae in their aquarium should act quickly. What is often referred to as “black algae” is actually a representative of the red algae. Read here how to correctly identify algae and what you can do to get rid of the nuisance.

Black algae – definition and designation

Throughout this article, we will use the term black algae – even if this is actually not biologically correct: there is no such thing as black algae. If you discover black algae in your aquarium, you are likely to have a representative of the red algae in front of you. They often look black and are therefore often referred to as black algae. We know two representatives of the red algae from the aquarium: the brush algae and the beard algae.

Where do black algae occur?

Black algae are mainly found on furnishings and decorative objects in the aquarium. They sit on stones, roots or on the aquarium technology. They also settle on the edges of the leaves of aquarium plants. Slow-growing plants are particularly often affected.

Correct identification of black algae: Which algae do I have in front of me?

Even for experts, it is not always easy to tell apart types of algae. A black alga can be a red alga. But in rare cases even filamentous algae look almost black. There is sometimes confusion here. It is even more difficult to distinguish between the two types of red algae, which black algae can belong to. See the table below for help.

Black algae are usually black or blackish in color: the shades range from deep black to gray to dark green. So it’s difficult to tell them apart by color.
A surefire way to identify black algae as red algae is to soak them in high-proof alcohol. The algae change color after a while and become red.

Black Algae: Determination

Black Algae: Brush Algae?

Brush algae usually form dark, dense clumps. Like the bristles of a soft brush, they look rather delicate and supple.

The length of the “brush bristles” reaches up to about two centimeters in length.

The outgrowths of this black algae do not branch.

Black Algae: Beard Algae?

The growth form of the beard algae is characterized by thicker, curly “hairs” that are less dense than those of the brush algae.

Beard algae reach a significantly greater length than other black algae. Around ten centimeters are not uncommon.

This alga partially branches.

How can I remove black algae?

In order to quickly get rid of the unloved guests, you need to use a few simple measures against black algae.

Identify the black alga: is it a beard alga or a brush alga?
Find out exactly what type of algae you are dealing with so that you can take action. In our blog you will find more information about both species (brush algae and beard algae) and other types of algae in the aquarium.

Take measures to remove algae. Manual removal of the black algae also plays an important role here. With these species, however, a particularly thorough procedure is necessary. You can read in detail how to remove red algae from the aquarium in our article on the subject.
Ensure that the conditions in your aquarium allow optimal plant growth. General tips for preventing and combating algae in the aquarium and a checklist for caring for aquarium plants can be found here in the blog. Don’t give the black algae a chance to appear again with a dense and healthy growth of aquarium plants.
We wish you every success in combating black algae!

How often does the water in the aquarium need to be changed? What should I watch out for when changing the water? Which conditioners do I have to use? Questions like these are often asked, especially by beginners. If you have a little experience in aquaristics, you will soon find the right method for changing the water for your aquarium – our tips give you a start and answer the most important questions on the subject.

Why do I need to change the water in the aquarium?

Many beginners ask themselves: Why do I have to change the water in the aquarium at all? Doesn’t the filter keep it clean enough? That’s not quite right: The filter serves to filter particles out of the water that make it cloudy. This keeps the aquarium water crystal clear. Above all, however, it has the function of biological filtration: nitrifying bacteria settle on the filter material. They ensure that the water quality is maintained. If you would like to know more about how this works, read more about the nitrogen cycle in our article Nitrate in the aquarium.

In addition to regular water changes in the aquarium, dense and healthy planting is essential for good water quality and stable water parameters.

Better water quality in the aquarium: fast-growing plants

Fast-growing aquarium plants are particularly well suited to maintaining the water quality between water changes in the aquarium: they absorb excess nutrients from the water. This significantly reduces the risk of an algae plague in the aquarium – even if you don’t manage to change the aquarium water in time.

For example, Egeria densa, the waterweed, whose German trade name already indicates its growth characteristics, is unbeatable when it comes to growth. Hardly any aquarium plant is as easy to care for and as fast-growing as it is.

Discover more fast-growing aquarium plants in our Fast-growing aquarium plants article or browse our aquarium plant shop!

However, the plants in the aquarium cannot keep the biological cycle going on their own. Regular water changes are necessary to B. Remove nutrients and debris that accumulate from the aquarium. Therefore, even in a lushly planted aquarium, the water must be partially replaced at regular intervals.

Water change in the aquarium: how often is it necessary?

A rule of thumb is: the water in the aquarium should be changed about every 14 days. This rule applies to a normal community aquarium. Of course, completely different intervals are conceivable for special tanks, such as rearing facilities. Some aquarists also swear by doing weekly water changes in smaller amounts.

Tip: Changing the water can easily be combined with caring for the plants in the aquarium.

Basic rule: It is better to change a small amount of water in the aquarium more often than a large amount of water infrequently. The larger the tank, the more stable the water values and the more likely it is that a water change will be “forgiven” – since the biological balance in large aquaria shakes less quickly.

How much water should I change in the freshwater aquarium?

You should change about a good third of the water in the aquarium. If you change too much water, there will quickly be an imbalance in the aquarium – the values ​​change too suddenly. Depending on the water parameters, this can have serious consequences. Animals and plants suffer from the sudden change in conditions.

A large water change of half or more of the tank volume is only carried out in emergencies: if the water is contaminated with germs, to combat algae in the aquarium or to quickly remove toxins from the water – for example if shrimp suddenly die in the aquarium. This is a rather drastic measure that you should only take if it is really necessary.

Water change in the aquarium: step by step

Regular water changes quickly become a routine part of regular aquarium maintenance.

Water change – what you need:

  • Hose for sucking off the aquarium water
  • Mulm bell for cleaning the aquarium floor (if required)
  • Buckets for collecting and transporting the water
  • Disc magnet or scraper for cleaning the aquarium glass
  • Rag or towel for spilled water

Preparation

Prepare all the utensils you need. Since water changes are rarely drip-free, we advise you to have a rag or an old towel handy. This is how you avoid water stains on the base cabinet. Now switch off the aquarium technology. Above all, the filter and the heater, which are under water, should be switched off before reaching into the aquarium. A defect can otherwise result in a dangerous electric shock.

Clean the aquarium panes

The water change is usually combined with cleaning the aquarium and the panes – these are first freed from algae with a suitable accessory. A light coating of green algae on the aquarium pane is normal. Regular cleaning ensures a good view of the tank, the aquarium plants and of course the inhabitants such as fish or invertebrates.

Water change with mud bell (optional)

If you use a mulch bell, you can clean the bottom of the aquarium particularly easily: changing the water and cleaning is done in one step. If you want to leave the sludge corners in your aquarium floor – for example in an aquarium for shrimps – it is sufficient if you remove coarse dirt and dead plant parts with a net or aquarium tweezers.

Water change with the hose

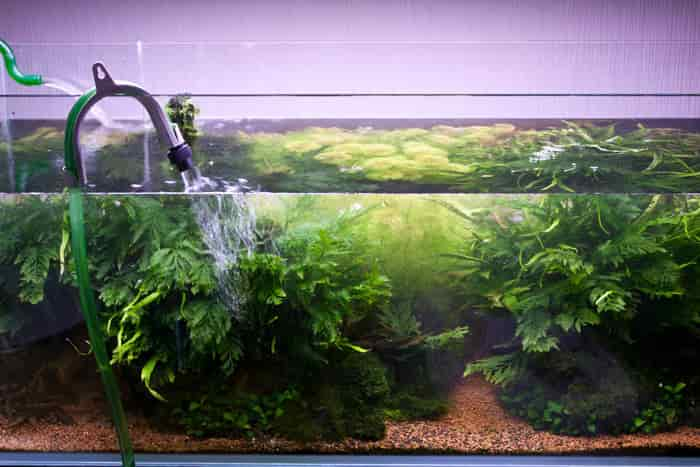
If you change the water in the aquarium using the hose (with or without a mulch bell), proceed as follows: The bucket is provided – make sure that it is lower than the water level in the aquarium. Then insert one end of the hose into the pool. Now suck the air out of the hose with your mouth briefly. The water starts to flow into the hose. Now you can easily let it run into the bucket. Surely every aquarist has accidentally taken a sip of aquarium water at some point, but you will soon find out the trick.

Tip: Use a light-colored bucket. It quickly happens that a fish or a shrimp is sucked up unnoticed. A scrutinizing look into the bucket prevents the worst when disposing of the old water.

Fill the aquarium with fresh water

The fresh tap water should definitely have the same temperature as the water in the aquarium. A slight deviation of one to two degrees is fine. Place the water in the bucket, condition it if desired, and slowly pour it into the aquarium. A small plate on the ground prevents it from being whirled up.

Which water do I use for changing the water in the aquarium?

For a normal community aquarium, the aquarium water is replaced with normal tap water. This is mixed with water conditioners and fertilizer for the aquarium as required. If you have water in your region that is very hard, or if you care for animals or plants with special requirements, you may have to treat it using other methods, such as an osmosis system. However, this is a topic for advanced aquarium owners. This is usually not necessary for an ordinary community tank.

We hope that with our tips on changing the water in the aquarium we have been able to give you a little help for the fascinating hobby of aquaristics. Have questions or comments? We look forward to your comment!

Floating algae can be recognized by the typical green coloring of the water in the aquarium. It is also called an algal bloom. Read here how this type of algae develops, where the cause of algae growth lies and what you need to know to combat floating algae.

Green water in the aquarium: What are floating layers?

The algae bloom in the aquarium is unmistakably recognizable by the green water in the aquarium. Sometimes a whitish cloudiness appears first. Floating algae are tiny, microscopically small algae that can completely obstruct the view in the aquarium after a short time. They float freely in the aquarium water and do not settle on aquarium plants, panes or the hardscape. In natural waters, floating algae form the phytoplanton, which is a food source for all filtering animals (e.g. mussels or certain shrimp).

Floating Algae: Causes for the occurrence of an algal bloom in the aquarium

Sudden fluctuations

Floating algae usually appear when there are strong, sudden changes in the conditions in the aquarium. This can be the case, above all, if the temperature rises significantly or there is intense solar radiation. This situation can arise when the aquarium is in the sun due to the change of seasons. If you set up your pool in autumn or winter, you may find that the sun is different in summer and reaches the pool. If this is the case, there is a need for action: An aquarium should never be exposed to direct sunlight – because this also promotes the growth of other types of algae such as filamentous algae, red algae or blue-green algae.

Imbalance in the nutrient situation

If regular water changes are neglected, certain nutrients can accumulate in the water while others are no longer available in sufficient quantities. Good care of the aquarium with a partial water change every one to two weeks (depending on the size of the aquarium) and proper fertilization of the aquarium plants helps to prevent floating algae. As with all types of algae in the aquarium, prevention is better than cure. A checklist for plant care in the aquarium can be found here in our blog — as well as tips for changing the water in the aquarium.

Algae bloom during the start-up phase of the aquarium

Algal blooms can also occur when the aquarium is in the running-in phase, if an ecological balance has not yet been established after setup. During this time, in addition to the development of harmless brown algae, an infestation with floating algae or an algal bloom can also occur. We advise you to select some fast-growing aquarium plants when setting up a new aquarium, so that algae don’t stand a chance from the start.

Fast-growing aquarium plant – Brazilian Pennywort

A very undemanding and fast-growing stem plant is the Brazilian pennywort Hydrocotyle leucocephala. It grows very quickly in the aquarium and is highly recommended for beginners. As soon as the shoots have reached the water surface, they continue to grow in a flooding manner.

Fighting floating algae: Measures against algal blooms

Use UVC clarifiers to combat floating algae

How can the algal bloom in the aquarium be combated? A UVC clarifier can help. The water is passed through the UVC sterilizer and kills the algae and their spores. The device is also helpful for other types of algae, such as brush algae. It ensures clear and germ-free water. The aquarium water is pumped through a bell containing a UVC lamp. This light kills the spores of floating algae and other types of algae.

Water fleas against algal blooms

Unfortunately, normal algae eaters in the aquarium fail with floating algae – the particles are too small to be eaten. However, water fleas are a good biological method of combating floating algae. As natural “enemies” they consume the tiny algae particles and thus ensure algae-free water. However, they are quickly eaten by fish kept in the aquarium.

Dark treatment against floating algae

A dark cure can also work against floating algae. Plants are better able to cope with the deprivation of light than algae, which is why this method is often used successfully when there is an algal bloom. Follow these steps:

Cover the aquarium so that no more light enters. Provide extra ventilation during this time and feed as sparingly as possible. Turn off the CO2 supply.
First carry out a water change to remove as many floating algae as possible from the aquarium.
The dark cure against floating algae can last up to two weeks. During this time you should observe the aquarium every few days to make sure that the inhabitants and plants in the aquarium are doing well and that the algae are reducing.
After the dark cure, a generous water change is carried out.

Basically, you should ensure that the causes of algae growth are eliminated. Because the measure only removes existing algae – and does not solve the original problem. You can also find more tips on how to combat algae in the aquarium here in the blog.

What are your experiences with floating algae or an algal bloom in the aquarium? Have you ever had green water in your aquarium? We look forward to your tips and comments!